Setting up a locally hosted environment is an important step in any WordPress development project. This allows you to safely test your website functionality in a completely private environment. This article will show you how to set up a local web server using XAMPP.
Building local WordPress sites is a popular practice among developers and site owners. You can test WordPress without creating a real website on the internet. Especially local websites are visible only on your computer. Similarly, you can try out different WordPress themes and plugins, test their functionality, and learn the basics of WordPress. If you already have a WordPress website, you can create a local copy of your site on your computer to try out new plugin updates before implementing them on your live site. If you want to create a live website, you will need a domain name and WordPress hosting. The end result is your own local WordPress test environment running on Windows. Furthermore, this involves three steps.
Downloading And Installing XAMPP
Firstly visit the given link to download the XAMPP installation file for windows.
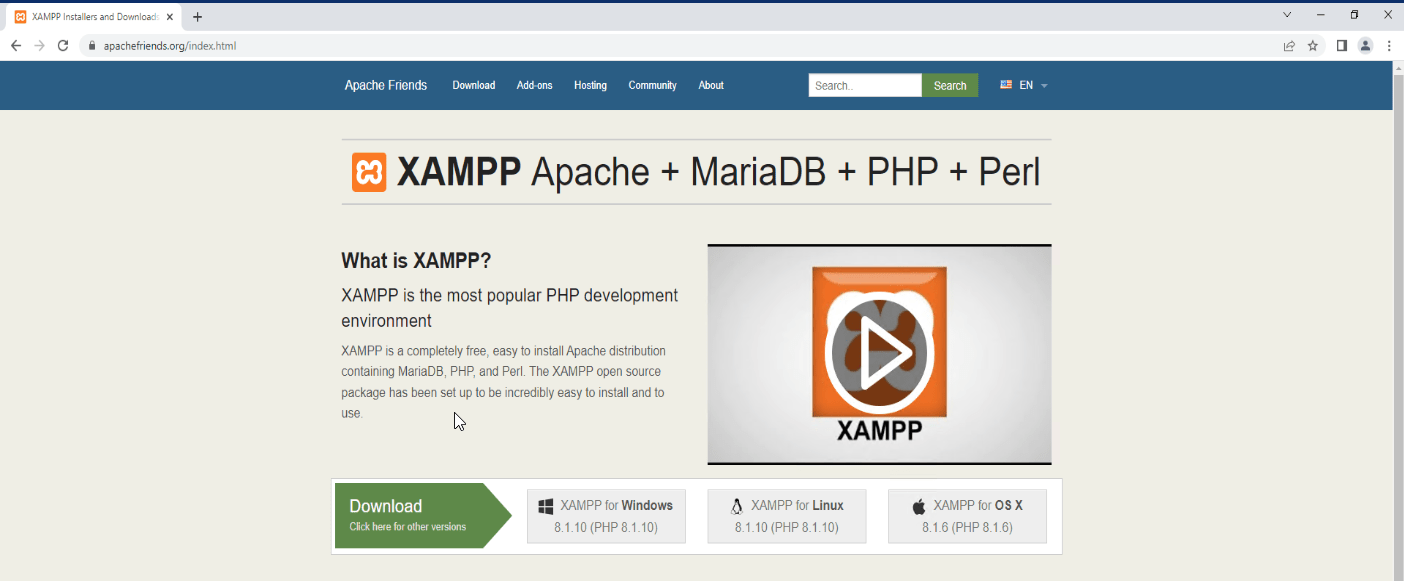
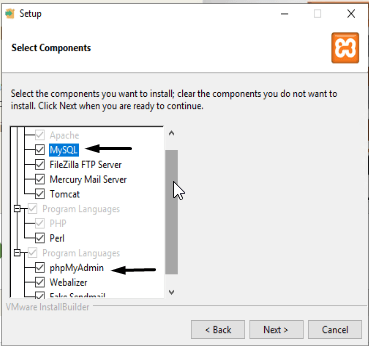
Once the download is finished run the XAMPP installation file and proceed through the setup steps. Select the given components and proceed with the installation.
After selecting the required component select a working directory where you want this app installed. After that Click on Next and the installation will start kindly give it some time to finish.
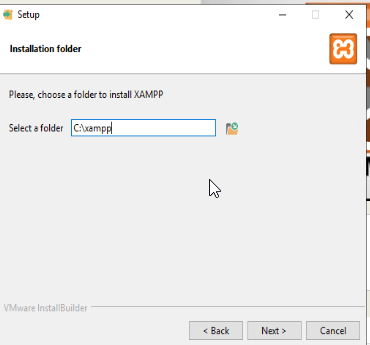
We recommend that you do not use the Program Files directory as it can cause write permission issues. The directory you choose at this point is where your local WordPress files reside.
Configuring The Local Server
Once the installation is finished open the XAMPP Control Panel. Start Apache and MySQL services.
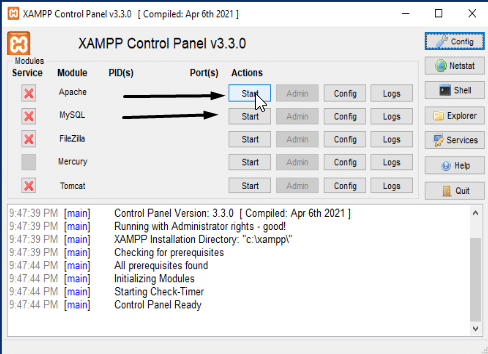
The status of the services will change to green once they are started.
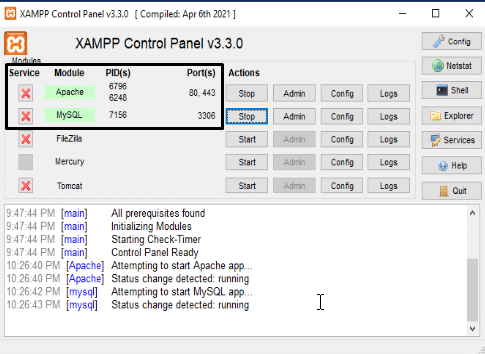
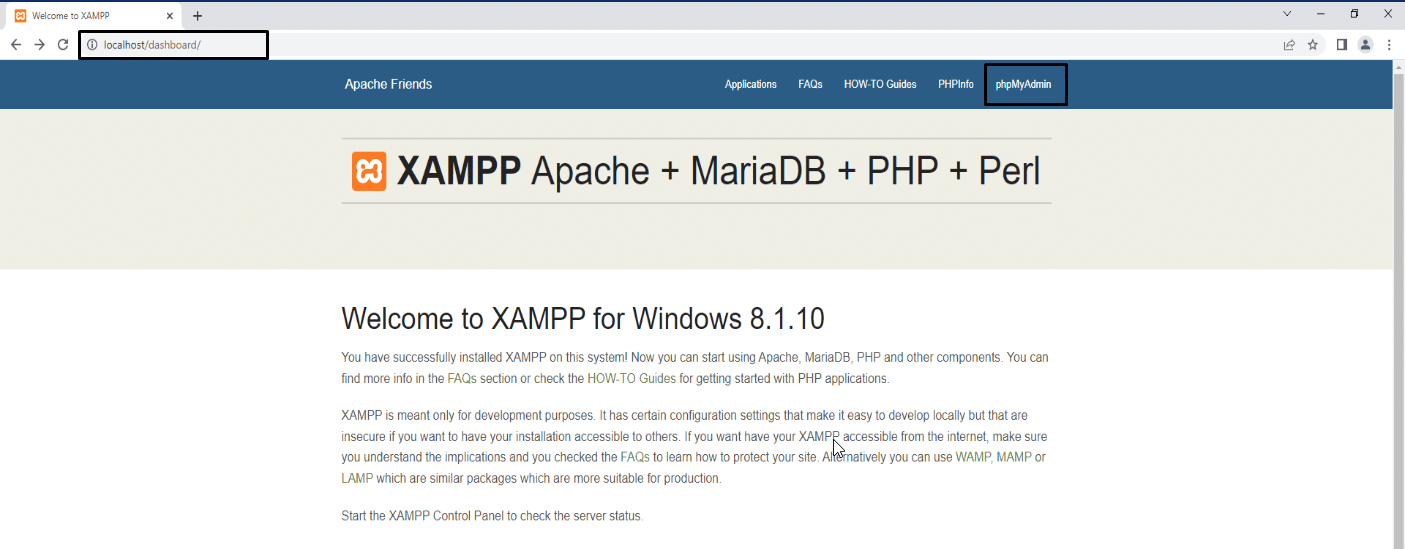
As you can see the running modules is using the given port number for intercommunication. So we have to open these ports from the windows firewall if required. To check that the modules are working browse http://localhost/. If all goes well, this will bring up the XAMPP dashboard. From there, select the phpMyAdmin button on the top right of the page.

Downloading And Adding The WordPress File
Now visit WordPress.org in your browser and download the latest version of WordPress.
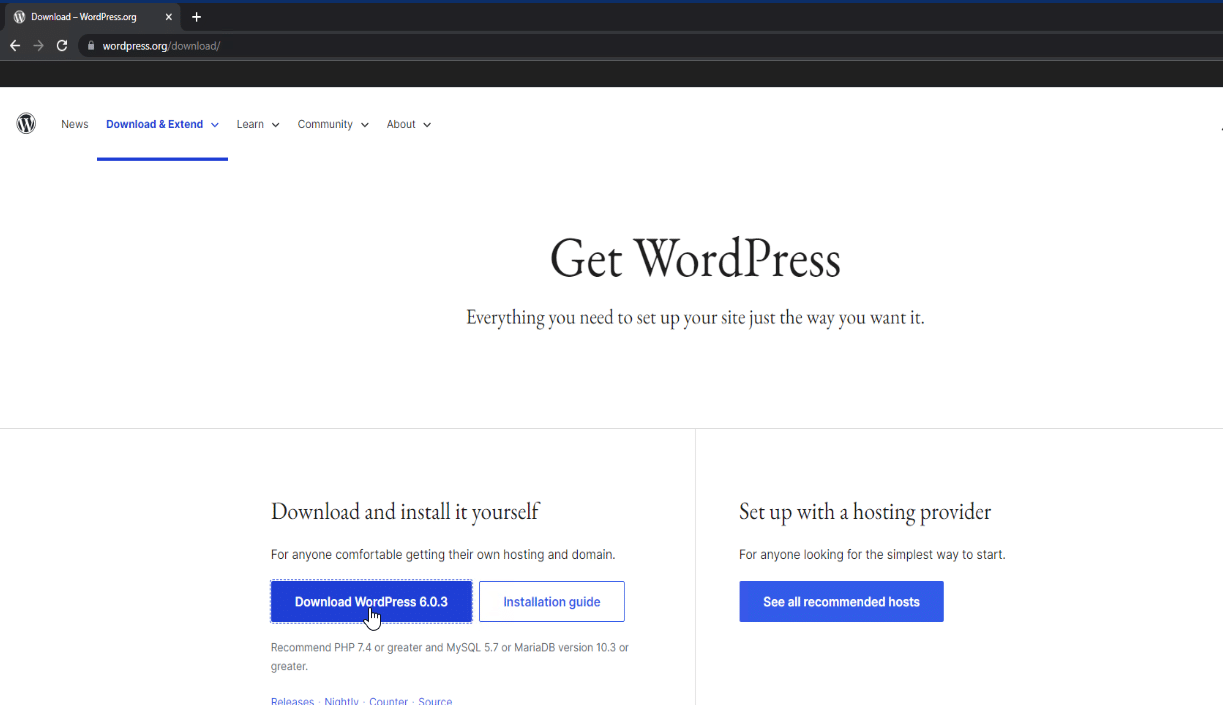
Once the download is finished extract the wordpress-6.0.3.zip file. And then locate the file wp-config-sample.php.
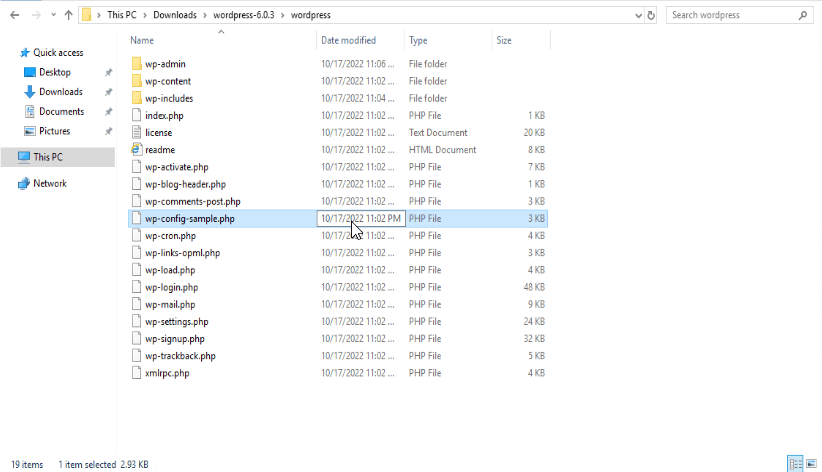
Open this file in a text editor and locate the given line.
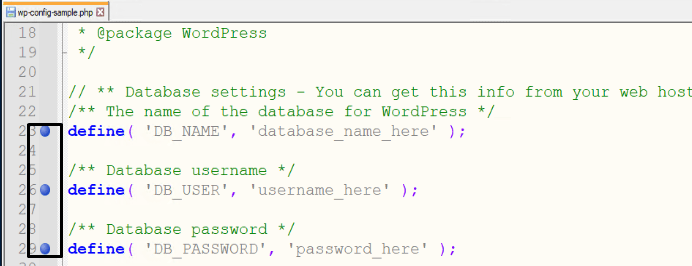
Replace the lines with your database name, username, and password so that it looks like this. Once this is done save the file.

Now move the whole WordPress installation folder to C:\xampp\htdocs

Now open the given link in your web browser http://localhost/wordpress/.
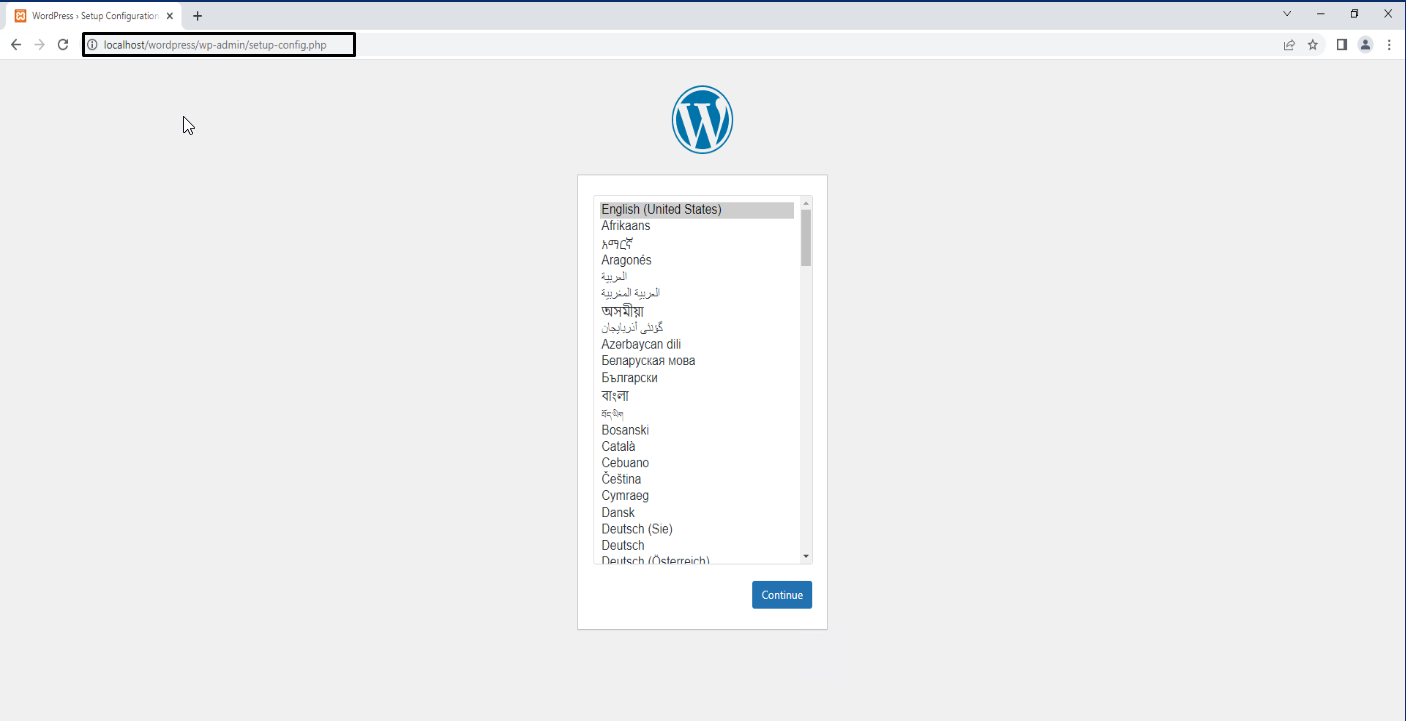
If everything is alright then you will be redirected to the standard WordPress installation procedure page.
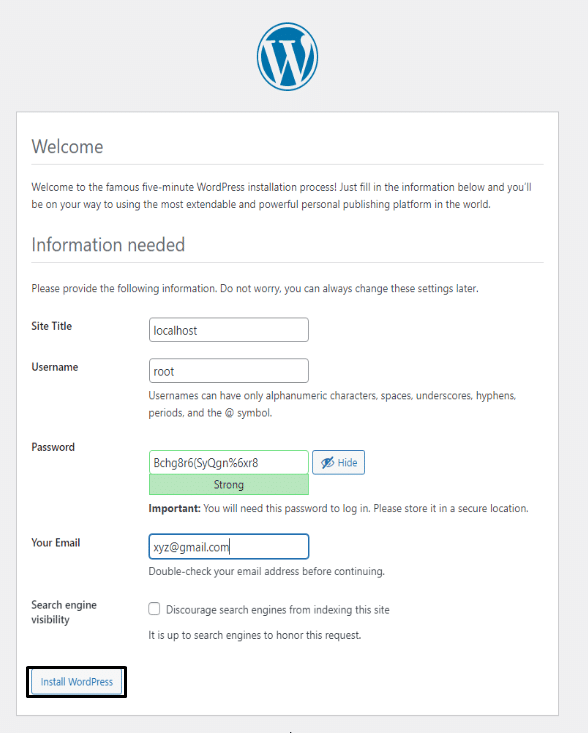
Enter the login details and Log In.
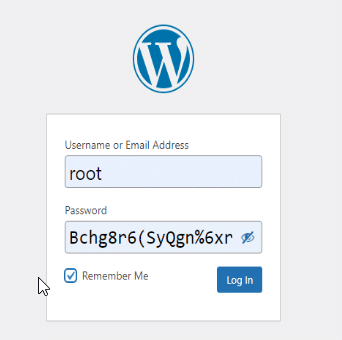
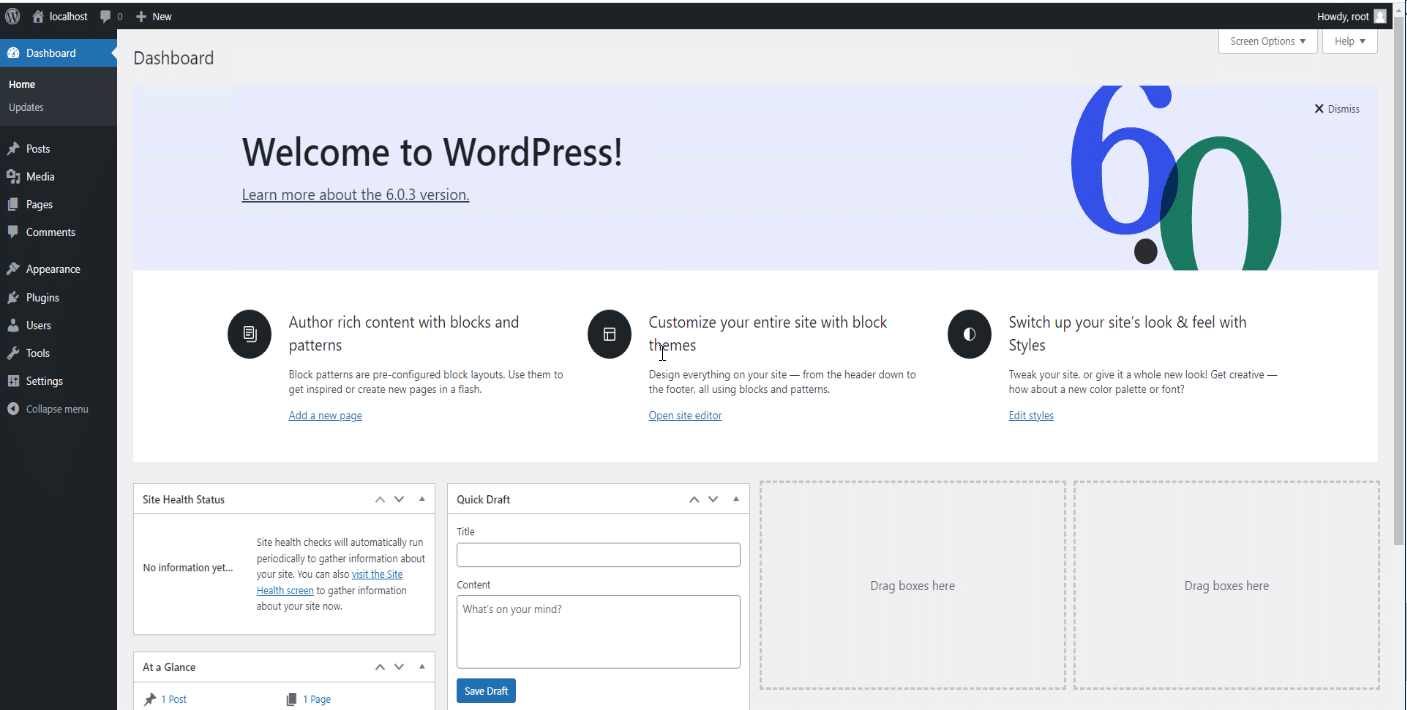
That’s it and now you have a working WordPress site ready to go.
Conclusion
A locally hosted WordPress site is a site that can only be accessed by users on your network (that is, it has no live components). This type of website therefore serves as a safe environment in which to test new features and troubleshooting methods. A local website is great for doing the following types of tasks:
- Create a new theme and plugin:If you’re using a local website, you don’t have to worry about issues that may arise during development on your live WordPress website.
- Website staging:You can make a copy of your live website and use it for testing purposes.
- Website debugging and troubleshooting:Working inside the live site to fix bugs and other issues can cause bigger problems (and potentially costly downtime). By creating a local WordPress site, you can experiment with different solutions and easily restore previous versions of your site if you make a mistake.
For these reasons, building a locally hosted WordPress site is highly recommended for almost all development projects. But first, I need a tool that helps me set up a locally hosted website quickly and easily.
