Hello, Users, Deapool here. The primary IP that is assigned to the VPS is by the automatic or manual network it’s attached to. Primary IP address is used to access the VPS from another machine or remotely while being connected to internet. These primary IP expose itlself on a public class so that it can be accessed from everywhere with some expceptions. Now with todays Cloud Computing models there are reasons to change VPS IP, some do it to improve overall security, operation managements and browsing privacy. It also helps you mask from hackers, ISP and the websites that uses web tracking. Let’s get started how to change VPS IP with 99RDP.
Generally 99RDP VPS comes with a single pimary IP IPv4 address to connect the server. To order and change VPS IP(IPv4) address you can always count on us. Currently 99RDP does not gives the option to change VPS IP in the Server management panel, however you can always place a ticket for additional IP and our technical engineers will help you change the IP. 99RDP additional VPS IP doesn’t cost much, only priced at $10 per/IP . Kindly follow the given link to make a ticket and order your first pair of IPv4 IP. Once the ticket is provisioned and the purchase is complete you will get some additional information related to the IP address such as its Gateway and Subnet in the ticket. The additional IP’s will also show up in the Server Manger panel. Once you have these details you can proceed to next step.

Follow the given instructions to change the primary IP address of your VPS:
- On the Welcome screen of Client Area click on Services.

- Click the Active service for which you want to change the IP.

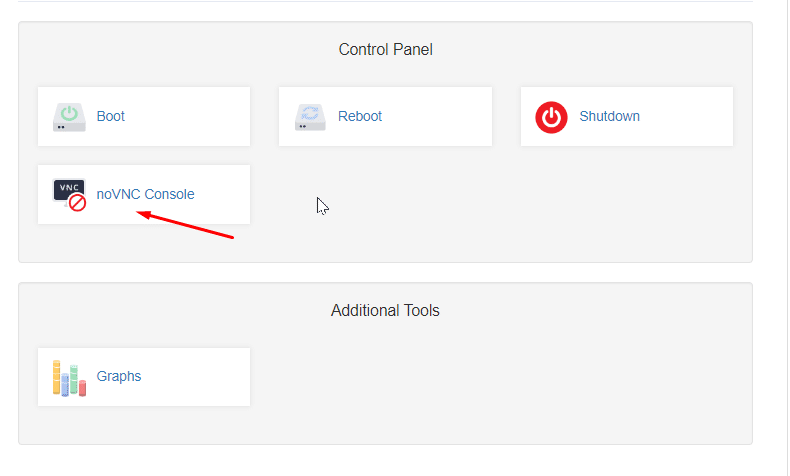
- Click on noVNC Console to access the VPS.
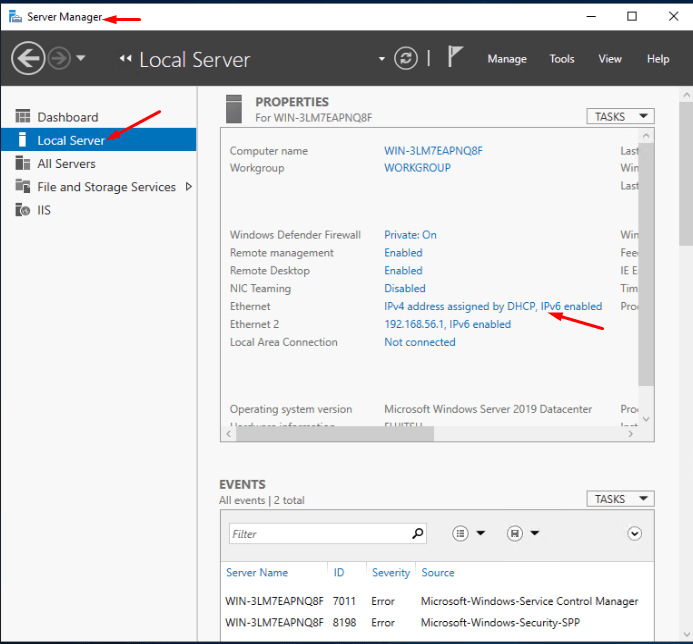
- Sign in to the server, open the Server Manager, go to Local Server, and click on Ethernet: IPv4 address assigned by DHCP.
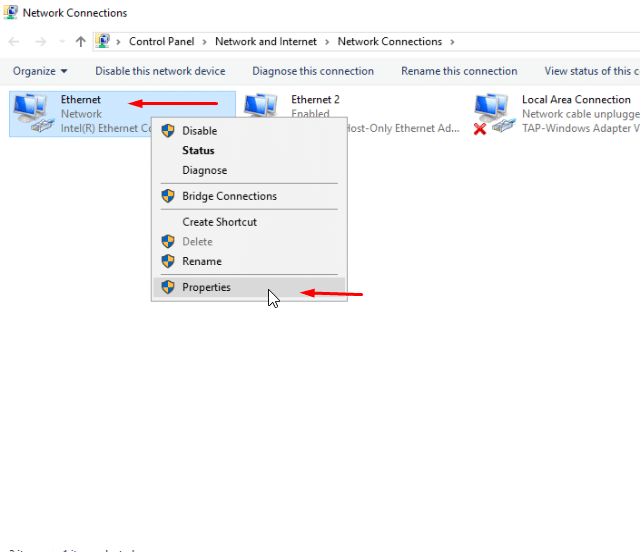
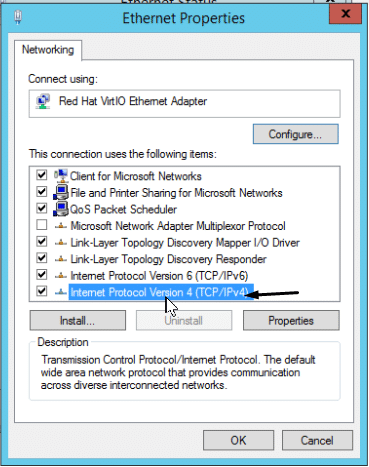
- Open the Network Device, go to Properties.
- Click On Internet Protocol Version 4 (TCP/IPv4).
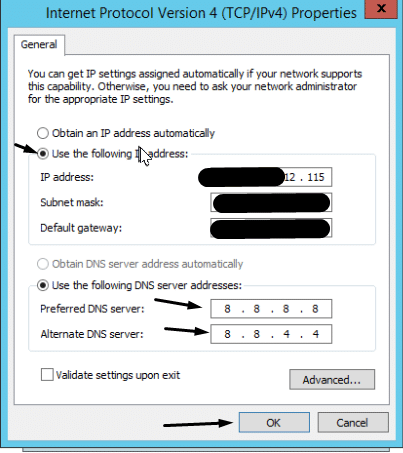
- Click on Use the following IP Address, enter the details. Enter Google DNS. Click Ok.
- Restart the server.
Done, VPS primary IP is changed. You can access the VPS with the new Additional IP over remote. You can also check that the address “***.***.*12.115:3389” is open on our Port Checker Tool.
A VPS can have multiple IP address for different tasks but this is just a basic handout on how to change your VPS primary IP to additional IP. The steps are done on a Windows 2012 VPS, however the procedure is same for Windows 2016 and 2019. Thank You for the time.