Hello everyone, Today we will see “How to configure OBS properly and stream like a pro”. Remote Desktop Protocol is a proprietary protocol developed by Microsoft which provides a user with a graphical interface to connect to another computer over a network connection. The user employs RDP client software for this purpose, while the other computer must run RDP server software.
OBS Studio is a free, open-source, and cross-platform screencasting and streaming app. It is available for Windows, macOS, Linux distributions, and BSD. The OBS Project raises funds on the platforms: Open Collective and Patreon.
Used Source –
- NVIDIA GeForce GTX 1080 Windows Server
- OBS Studio
- 4k Media Source
- Youtube Streaming
Let’s Configure the OBS Streaming –
-
First, Install OBS Studio.
-
You can download it from the Official OBS Studio Website – OBS.
-
After finishing downloading Install it through the default process.
-
Now open your OBS Studio from Desktop Icon.
-
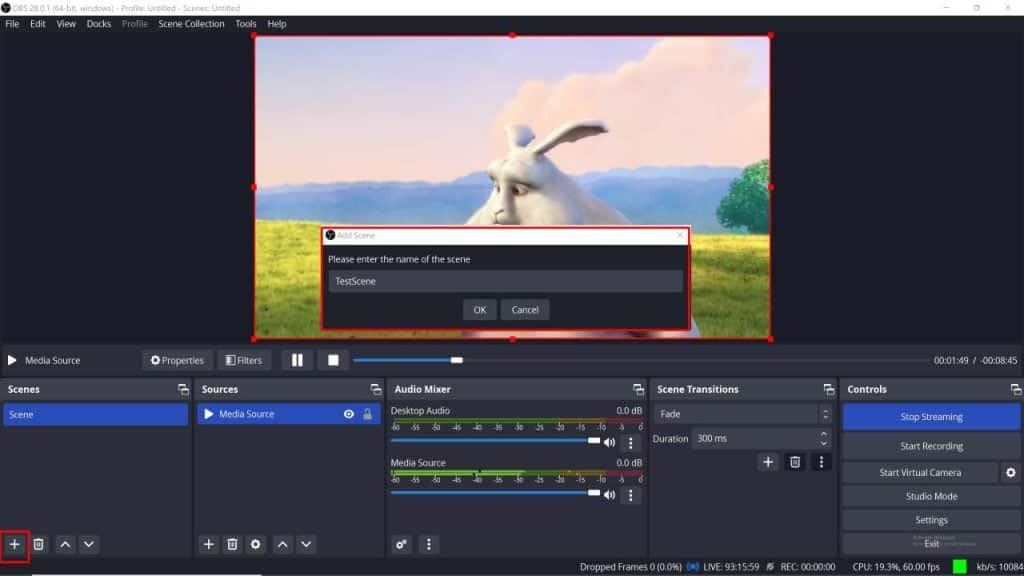
After this Create a New Scene by Clicking the “+” button from Scene Panel.
-
Give it a suitable name and press Enter.
-
After this from the Source Panel click on the “+” button to add a new Source.
-
Now choose the media source option as we are streaming media files.
-
Now click on the Browse button and choose your desired media file.
-
Click on the ok button to use the media file.
Configure the Profile Setting –
-
Click on the Settings option from the Control Panel.
- Go to the Stream option and choose Youtube streaming. Use the Stream key to connect your Account.
-
In the Output option, you can change the Audio and Video Bitrate.
-
From the Video option change the output video resolution and FPS as you wish.
-
After this just Press Apply button to save your settings.
-
That’s it, Now your 4k Streaming setting is ready for live.


