How to Create a Minecraft Server on a Windows Server
Minecraft, the immensely popular sandbox game, provides an exciting multiplayer experience when played on a dedicated server. If you’re eager to set up your own Minecraft server on a Windows Server, this blog post will guide you through the process step by step. By following these instructions, you’ll be able to create a server environment where you and your friends can explore, build, and enjoy Minecraft together. Let’s get started!
Prerequisites:
- A Windows Server: Ensure that you have access to a Windows Server (Windows Server 2012 or later).
- Administrative Access: You’ll need administrative access to install and configure software on the server.
- Stable Internet Connection: A reliable and fast internet connection is crucial for hosting a smooth Minecraft server.
Step 1: Checking System Requirements Before setting up the Minecraft server, verify that your Windows Server meets the following system requirements:
- Windows Server 2012 or later.
- At least 4GB of RAM (8GB recommended).
- Sufficient storage space for the server files.
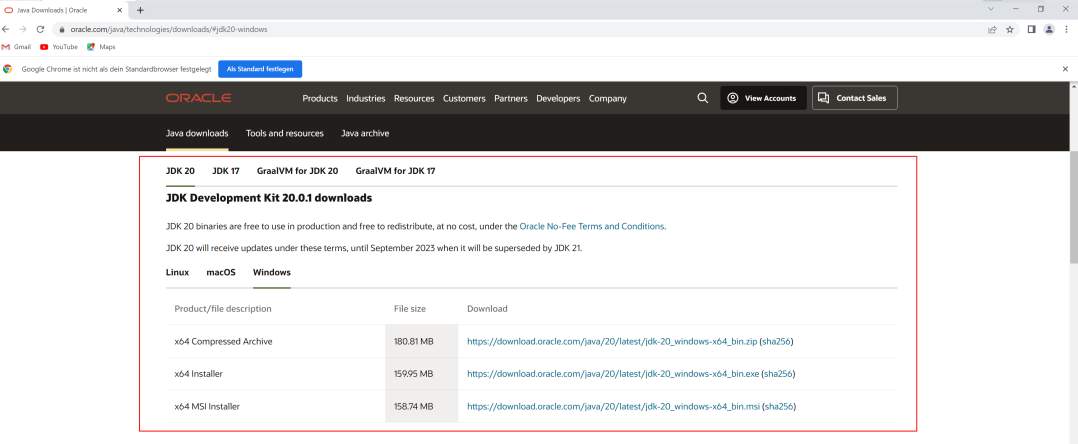
Step 2: Installing Java Minecraft requires Java to run, so you’ll need to install the Java Development Kit (JDK) on your Windows Server. Here’s how:
- Download the latest JDK from the Oracle website (https://www.oracle.com/java/technologies/javase-jdk11-downloads.html).
- Run the installer and follow the on-screen instructions to install the JDK.
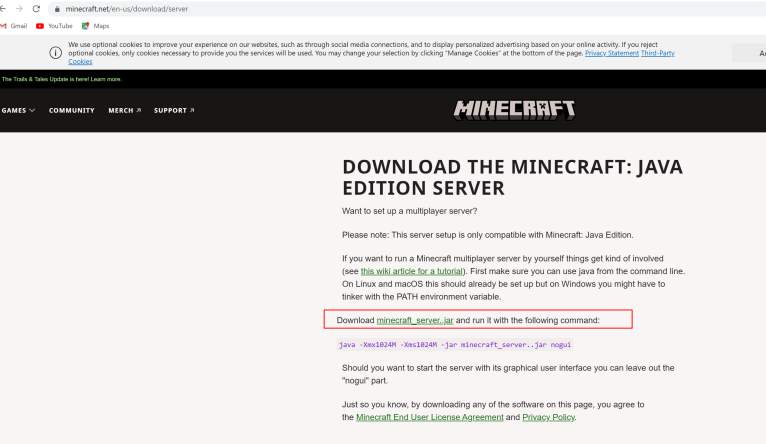
Step 3: Downloading the Minecraft Server Software
- Visit the official Minecraft website (https://www.minecraft.net/en-us/download/server) and download the server software (JAR file).
- Save the JAR file in a dedicated folder on your Windows Server.
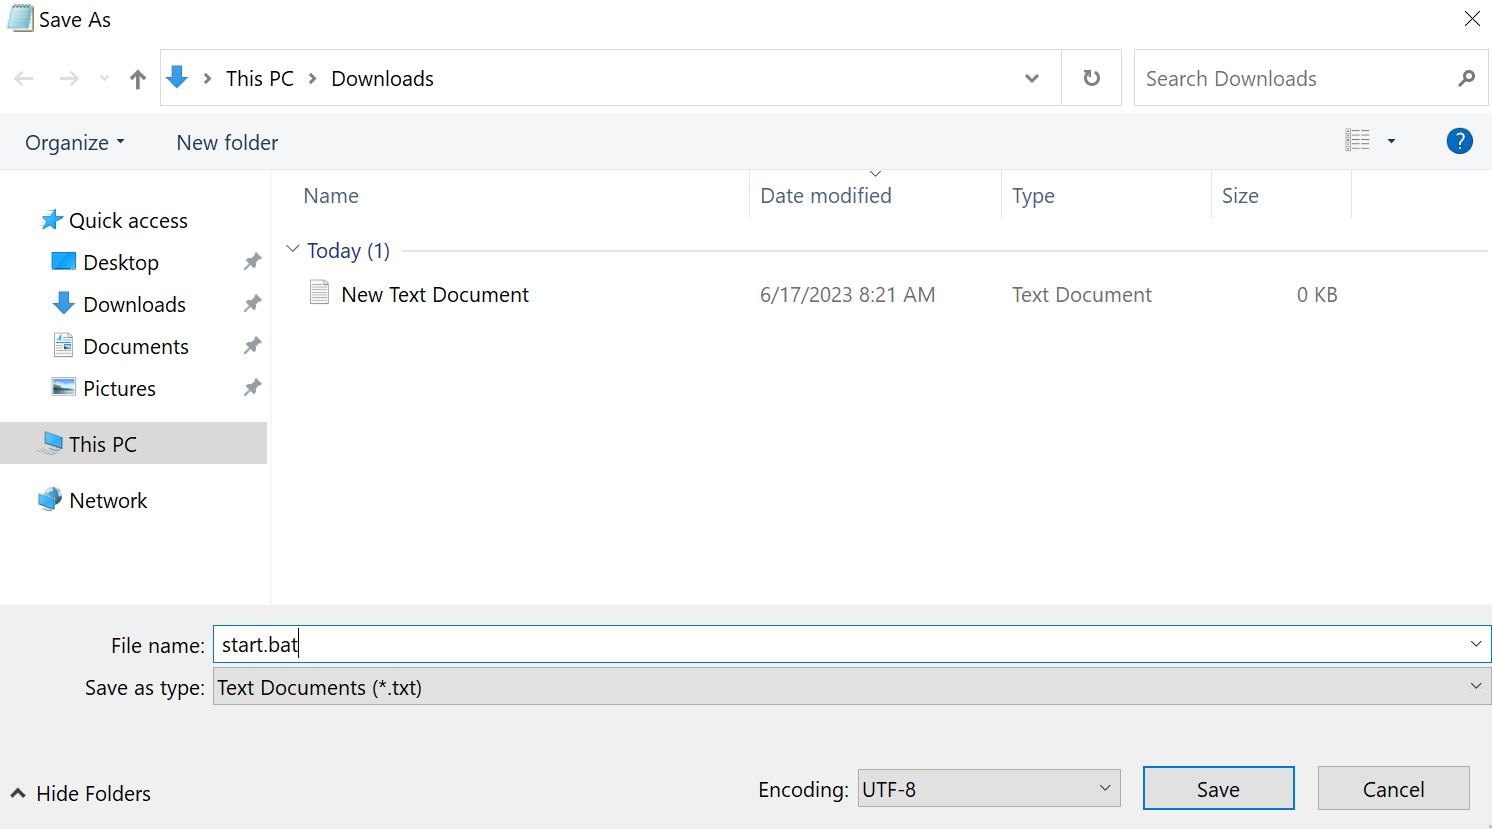
Step 4: Configuring the Minecraft Server
- Open the folder where you saved the server JAR file.
- Create a new text document and rename it to “start.bat”.
- Right-click on the “start.bat” file and select “Edit” to open it in a text editor.
- In the text editor, type the following command:
java -Xmx1024M -Xms1024M -jar server.jar noguiNote: Adjust the “-Xmx” and “-Xms” values to allocate more or less RAM to the server, if desired
- Save the “start.bat” file and exit the text editor.
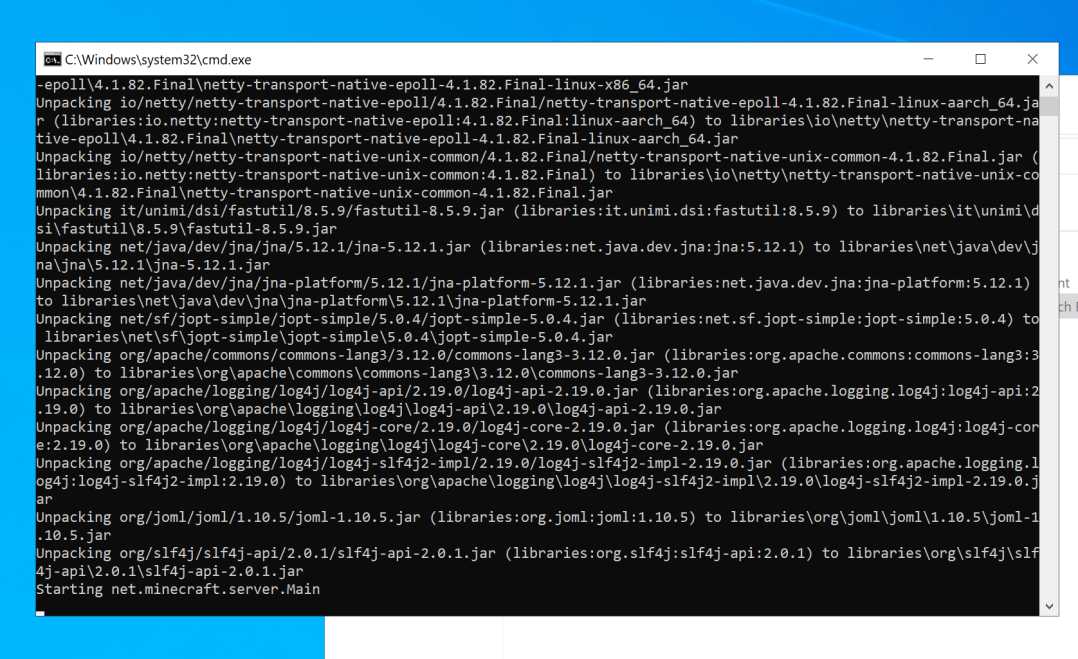
Step 5: Starting the Minecraft Server
- Double-click the “start.bat” file to launch the Minecraft server.
- Wait for the server to finish initializing.
- Once you see the message “Done,” the server is ready to accept connections.
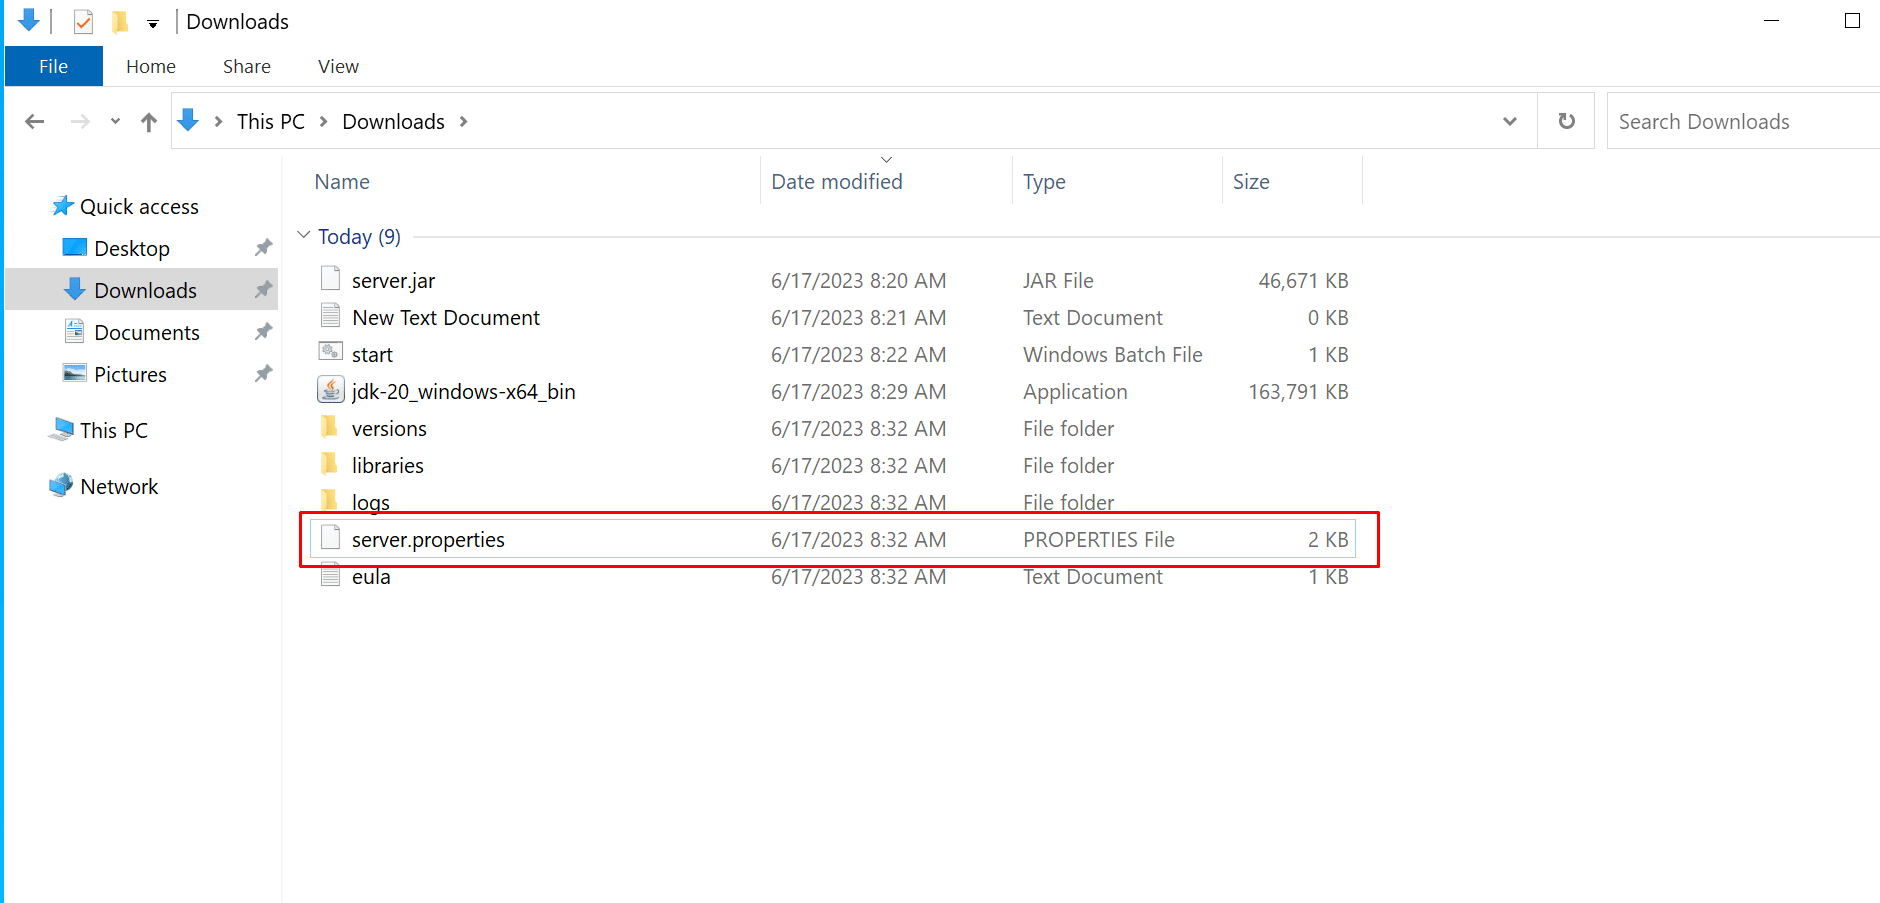
Step 6: Configuring Server Properties
- Open the server folder and locate the “server.properties” file.
- Right-click on the file and select “Edit” to open it in a text editor.
- Adjust the server settings to your preference, such as game mode, difficulty, and server name.
- Save the changes and close the text editor.
Step 7: Allowing Minecraft Server Access Through the Firewall
- Open the Windows Server’s Control Panel.
- Navigate to “System and Security” > “Windows Defender Firewall” > “Allow an app or feature through Windows Defender Firewall.”
- Click “Change settings” and then “Allow another app.”
- Browse and add the Java executable (usually located in “C:\Program Files\Java\jdk<version>\bin\java.exe”).
- Check both private and public network options for the added Java executable.
- Click “OK” to save the changes.
Step 8: Connecting to Your Minecraft Server
- Launch Minecraft on your computer.
- Click “Play” and then select “Multiplayer.”
- Click “Add Server” and enter a name for your server.
- In the “Server Address” field, enter the IP address or domain name of your Windows Server.
- Save the settings and click “Join Server.”
Congratulations! You have successfully created your own Minecraft server on a Windows Server. Now you can invite your friends to join and embark on exciting Minecraft adventures together. Remember to customize server settings, explore plugin options, and maintain regular backups to enhance your gaming experience and ensure the safety of your world. Enjoy your new Minecraft server!
Minecraft Server (F.A.Q)
What is Minecraft Server?
A Minecraft server is a computer or system that hosts the multiplayer version of Minecraft, allowing multiple players to connect, play, and interact in the same virtual world together. It facilitates multiplayer gameplay and enables customization through various settings and the use of mods or plugins.
Can we use this on Windows Server?
Yes, you can use Minecraft Server on Windows Server. Check the requirments on the Post.
Which RDP Should i Buy For Minecraft Server?
you can check this plan for Running Minecraft Sever – Cheap Dedicated Server
Can I upgrade my Shared RDP to Dedicated RDP?
Yes, It’s possible. You can Submit a ticket for this.
Can I host multiple websites on a VPS?
Yes, For this you need to buy a Dedicated Server
Payment Methods Available for Our Services
Currently we accept PayPal, Bitcoin, Perfect Money, Webmoney, Payeer, Paytm, UPI, WeChat, AliPay, Credit/Debit Card, BTC, ETH and other Crypto currency.


