Setting up DNS (Domain Name System) in Windows 10 is a straightforward process that can significantly improve your internet browsing experience, enhance security, or help troubleshoot network issues. This guide will walk you through the steps required to configure DNS settings on your Windows 10 device.
What is DNS?
DNS, or Domain Name System, is a fundamental part of the internet infrastructure. It translates human-readable domain names (like www.example.com) into IP addresses (like 192.168.1.1) that computers use to identify each other on the network. Proper DNS configuration can lead to faster internet speeds, better reliability, and improved security.
Why Change DNS Settings?
There are several reasons why you might want to change your DNS settings:
- Improved Speed: Some DNS providers offer faster resolution times.
- Enhanced Security: DNS services like OpenDNS and Cloudflare provide features like malware blocking and parental controls.
- Reliability: Third-party DNS services can be more reliable than those provided by your ISP.
- Customization: You can tailor DNS settings to your specific needs.
Steps to Set Up DNS in Windows 10
Follow these steps to configure DNS settings on your Windows 10 device:
1. Open Network & Internet Settings
- Click on the Start Menu: Click the Windows icon in the lower-left corner of your screen.
- Go to Settings: Click on the gear icon to open the Settings menu.
- Select Network & Internet: In the Settings window, click on “Network & Internet”.
2. Change Adapter Options
- Open Adapter Settings: In the Network & Internet settings, scroll down and click on “Change adapter options”. This will open the Network Connections window.
3. Access Properties of Your Network Connection
- Right-click on Your Network Adapter: Find the network adapter you are using (usually labeled as “Ethernet” or “Wi-Fi”), right-click on it, and select “Properties”.
4. Configure DNS Settings
- Select Internet Protocol Version 4 (TCP/IPv4): In the Properties window, scroll down and double-click on “Internet Protocol Version 4 (TCP/IPv4)”.
- Open DNS Settings: In the TCP/IPv4 Properties window, select “Use the following DNS server addresses”.
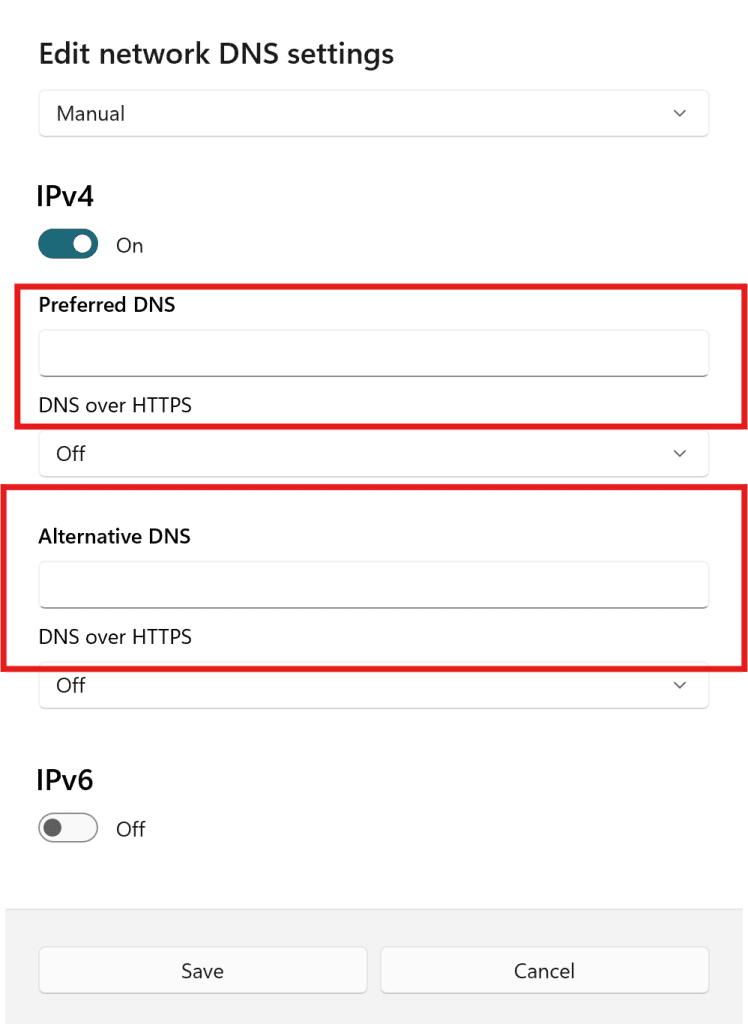
- Enter Preferred and Alternate DNS Servers: Enter the DNS addresses you wish to use. For example:
- Google DNS: 8.8.8.8 (Preferred), 8.8.4.4 (Alternate)
- Cloudflare DNS: 1.1.1.1 (Preferred), 1.0.0.1 (Alternate)
- OpenDNS: 208.67.222.222 (Preferred), 208.67.220.220 (Alternate)
- Save and Close: Click “OK” to close the TCP/IPv4 Properties window, then click “Close” on the network adapter properties window.
5. Verify DNS Settings
- Open Command Prompt: Press
Windows + R, typecmd, and press Enter. - Run ipconfig /all: Type
ipconfig /alland press Enter. Look for your network adapter and verify that the DNS server addresses are correctly listed.
Additional Tips
- Flushing DNS Cache: After changing DNS settings, you may want to flush the DNS cache to ensure the changes take effect immediately. In Command Prompt, type
ipconfig /flushdnsand press Enter. - Testing New DNS: To test the performance and reliability of your new DNS settings, you can use tools like
nslookup,ping, or dedicated DNS benchmarking tools.
Conclusion
Changing DNS settings in Windows 10 is a simple yet powerful way to optimize your internet experience. Whether you are looking for faster browsing speeds, enhanced security, or improved reliability, setting up a third-party DNS can provide numerous benefits. Follow the steps outlined in this guide to easily configure DNS on your Windows 10 device.
Happy browsing!
Feel free to leave a comment or ask questions if you need further assistance with your DNS settings. If you found this guide helpful, share it with others who might benefit from better DNS configurations.
How to Set Up DNS in Windows 10 (F.A.Q)
Why should I change my DNS settings?
What are some recommended DNS servers?
- Google DNS: 8.8.8.8 (Preferred), 8.8.4.4 (Alternate)
- Cloudflare DNS: 1.1.1.1 (Preferred), 1.0.0.1 (Alternate)
- OpenDNS: 208.67.222.222 (Preferred), 208.67.220.220 (Alternate)


