Introduction
CentOs is one the most popular Linux Distros to be used by Linux Users. Also, some of the other popular distributions such as Ubuntu and Fedora are affiliates. If you want to use RDP on your Linux server, you can solve it by using the XRDP service. This article introduces this service and the concepts to install the XRDP server.
XRDP uses the same RDP (Microsoft Remote Desktop Protocol) to provide graphical login to remote machines. XRDP accepts connections from various RDP clients. Freerdp, Rdesktop, Neutrinordp, Microsoft Remote Desktop Client (for Windows, macOS, iOS, and Android). Like a remote desktop from Windows to Windows, the XRDP server not only supports graphics remote processing but also has features like:
- Two-way clipboard transfer (text, bitmap, file)
- Audio -direct
- Drive redirect (mounted the local client drive to a remote machine)
How To Install XRDP on CentOs 7 Or other Linux Distros
CentOs Core does not come with a graphical environment. To uses the XRDP firstly we have to set up a Graphical environment on our CentOs 7 distro. This is an open-source UNIX-like package that works by bridging graphics from the X Windows system to the client and vice versa. To connect to CentOs, XRDP needs the XORG module. This allows the X server to act like XRDP.
Steps To Install XRDP server
To install the XRDP we need a root user while making any major changes to the system, and a machine having CentOs 7 with at least 4 GB of RAM.
Update CentOs 7 Server
# yum update
After the update is finished reboot the server.
Install Any Graphical Desktop Environment
Kindly check out the given page How To Install GUI On 99RDP CentOS 7 VPS
Enable EPEL Repository
# yum install epel-release
Install XRDP On CentOs 7 Server
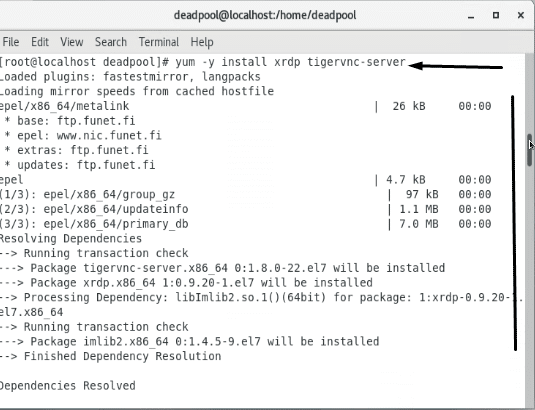
Install XRDP Server using the given command. This command will take some time depending on your network connection. It will give an output like this.
# yum -y install xrdp tigervnc-server
Configuring XRDP.services
Once the installation is complete start the XRDP service using the given command.
# systemctl start xrdp.service
# systemctl enable xrdp.service
Managing Firewall for XRDP.services
Basically, the XRDP.ini file is configured to work on port 3389. So we are going to add a permanent TCP rule for the XRDP service in the firewall using the given command.
# firewall-cmd –permanent –zone=public –add-port=3389/tcp
Reload the firewall to apply the changes.
# firewall-cmd –reload
Checking The Status of Firewall and XRDP.services
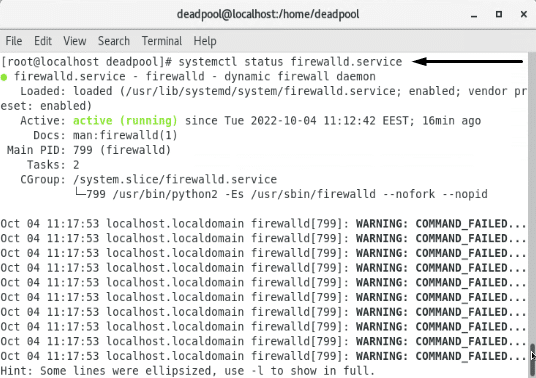
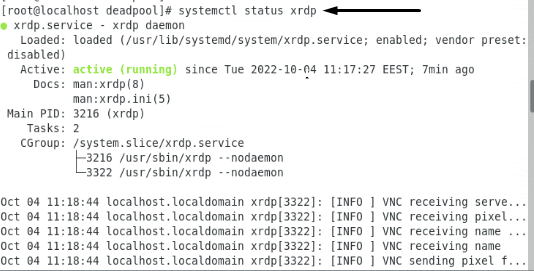
Now all the configuration steps are done. It’s time to verify our steps for any errors. Use the given command to check that the firewall service is up and running. We will also check the status of the port and XRDP.services using the given commands.
# systemctl status firewalld.service
# systemctl status xrdp
# netstat -na | grep 3389
This “netstat” command gives the output that the XRD service is listening on port 3389.
Checking CentOs 7 IP
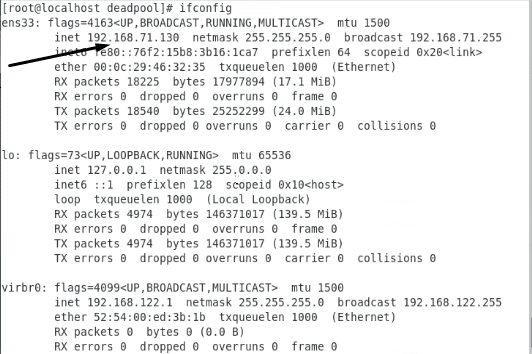
Use the given command to check the IP of your CentOs machine.
# ifconfig
Accessing XRDP CentOs Server with Windows Remote Desktop
After verifying all the services. Open up Remote Desktop and enter the IP and login details to connect to the XRDP server.

Conclusion
That’s it, folks, these are the easy steps to configure your CentOs 7 server to work with Remote Desktop Protocol. You can use any Remote software to access the CentOS server. Also, the steps are the same for all other Linux Distros. This XRDP service also gives you the freedom to connect your Clipboard and system drives to the CentOS server.
