Monitoring the performance of the CPU is essential to debug processes that are causing errors. Since the system performs faster and more efficiently in the case of a higher core system. However If a CPU core is unable to handle the heavy load of an application, it results in context switching of tasks. But too much context switching will also cause a rise in CPU usage. Because of that tracking and monitoring the CPU efficiently is essential. In this guide, we will explain to you how to check CPU usage in Ubuntu 18.04.
Requirements
- 99RDP Linux VPS
- Access To Terminal
How To Check CPU Usage In Ubuntu 18.04
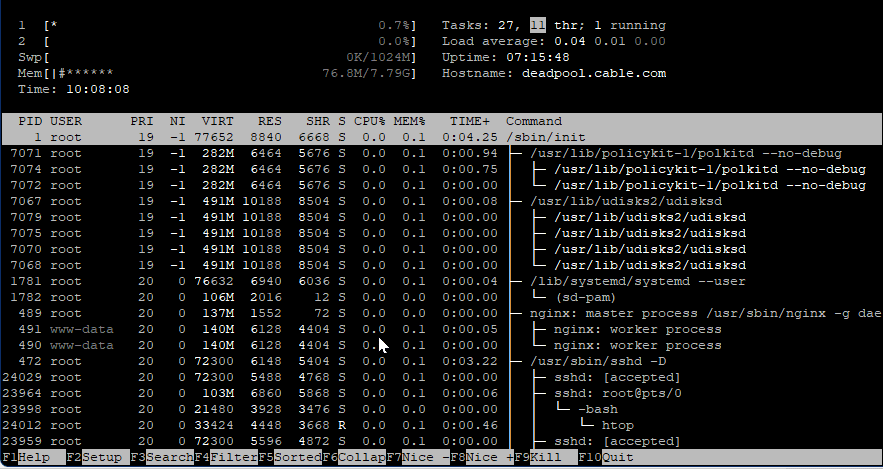
htop – interactive process viewer. htop is a free (GPL) ncurses-based process viewer for Linux. It is similar to the top tool but allows you to scroll vertically and horizontally, so you can see all the processes running on the system, along with their full command lines, as well as view them as a process tree, selecting multiple processes and acting on them all at once. Tasks related to processes (killing, renicing) can be done without entering their PIDs.
To install htop type in the given command in terminal and press enter.
# sudo apt install htop
The command will start the installation process, once it’s finished run the given command to show the current CPU usage of the system.
# htop
mpstat – Report processors related statistics. The mpstat command writes to standard output activities for each available processor, processor 0 being the first one. Global average activities among all processors are also reported. The mpstat command can be used both on SMP and UP machines, but in the latter, only global average activities will be printed. If no activity has been selected, then the default report is the CPU utilization report.
To install mpstat type in the given command in the terminal and press enter.
# sudo apt install sysstat
Once the utility is installed type in the given command to get a report for each active processor. The ‘mpstat’ command provides the same output as the ‘htop‘ command but in a more concise format.
# mpstat
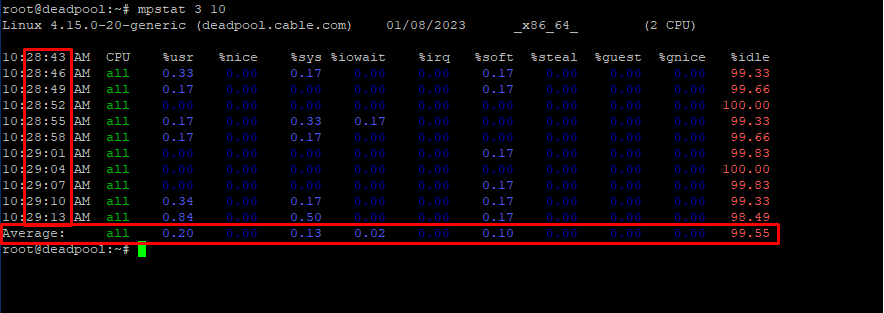
With the ‘mpstat’ tool you can also take CPU usage snapshots at regular intervals. For example, mpstat “time” “snapshots”.
# mpstat 3 10
In the following output, the command shows the CPU usage every 3 sec, this will be repeated 10 spans and then a final average report is generated.
vmstat – Report virtual memory statistics. The next tool is unlike its name as it is not only used to monitor memory statistics. vmstat reports information about processes, memory, paging, block IO, traps, disks, and CPU activity. The first report produced gives averages since the last reboot. Additional reports give information on a sampling period of length delay. The process and memory reports are instantaneous in either case.
Type in the given command to check vmstat CPU report.
# vmstat
nmon – systems administrator, tuner, benchmark tool. nmon is is a systems administrator, tuner, benchmark tool. It can display the CPU, memory, network,
disks (mini graphs or numbers), file systems, NFS, top processes, resources (Linux version & processes), and on Power micro-partition information.
To install nmon type in the given command in the terminal and press enter.
# sudo apt-get install nmon
Once it’s finished run the given command to check the usage.
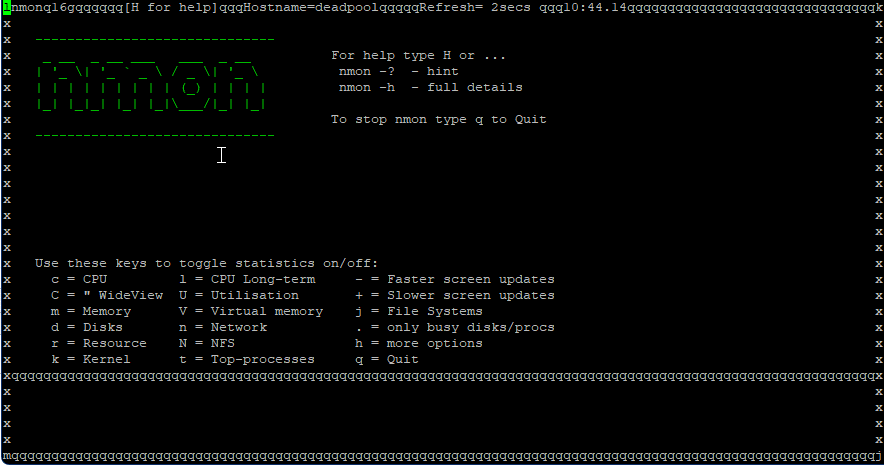
# nmon
This will launch the tool, and display all the options. To view CPU usage, press the letter c. To switch back, press c again. For more options, press h. To quit, press q.
Conclusion
CPU usage represents the amount of work the CPU is doing to process resources and manage operating system tasks. This metric is used to determine system performance by estimating average CPU utilization over time. There are several factors that contribute to high CPU usage, so it’s important to find the root cause to reduce it. This guide explained many useful commands and tools to help users monitor and troubleshoot their CPU-related issues on Ubuntu 18.04.


