Introduction
A Telegram bot can be a powerful tool to automate tasks, provide information, and interact with users within the Telegram messaging app. Deploying a bot on a Virtual Private Server (VPS) offers greater flexibility, control, and scalability compared to hosting it on a shared platform.
Prerequisites
Before we dive into the tutorial, ensure you have the following:
- A Telegram account: This is essential for creating and interacting with your bot.
- A VPS: You can choose from various providers like DigitalOcean, Linode, or Vultr.
- Basic knowledge of Linux and command-line interface: Familiarity with commands like
ssh,sudo, andaptwill be helpful.
Step 1: Create a Telegram Bot
- Find the BotFather: Search for “BotFather” on Telegram and start a chat with it.
- Create a New Bot: Send the command
/newbot. - Choose a Name and Username: The BotFather will prompt you to provide a name and a unique username for your bot.
- Receive Your API Token: Once created, the BotFather will send you an API token. Keep this token safe, as it’s crucial for accessing your bot’s functionality.
Step 2: Set Up Your VPS
- Connect to Your VPS: Use an SSH client (like PuTTY or Terminal) to connect to your VPS using its IP address and credentials.
- Install Required Packages: Depending on your programming language and bot framework, you’ll need to install specific packages. For Python and the
telebotlibrary, you can use the following command:sudo apt install python3 python3-pip sudo pip3 install telebot
Step 3: Create Your Bot Script
- Create a Python Script: Create a new Python file (e.g.,
bot.py) on your VPS. - Import Necessary Modules: Import the
telebotlibrary and any other required modules. - Initialize Your Bot: Use the API token you received from the BotFather to initialize your bot object.
- Define Handlers: Create functions to handle different types of messages (e.g., text, commands).
- Start the Bot: Use the
polling()method to start your bot and listen for incoming messages.
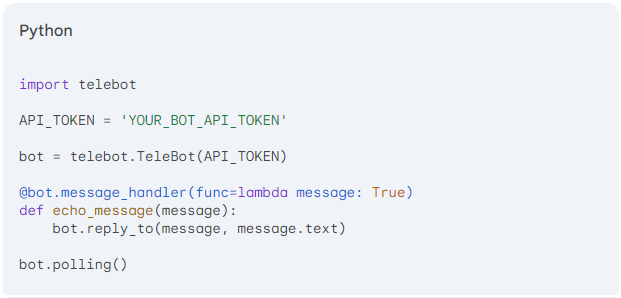
Example Python Script:
import telebot

API_TOKEN = 'YOUR_BOT_API_TOKEN'

bot = telebot.TeleBot(API_TOKEN)

@bot.message_handler(func=lambda message: True)
def echo_message(message):
    bot.reply_to(message, message.text)

bot.polling()
Step 4: Run Your Bot
- Make Your Script Executable: Use the following command to make your script executable:
chmod +x bot.py - Start the Bot: Run your script:
./bot.py
Additional Considerations
- Deployment: Consider using a process manager like PM2 to ensure your bot runs continuously.
- Security: Protect your API token and VPS credentials.
- Scalability: If your bot receives heavy traffic, you might need to scale your VPS or use a cloud-based platform.
- Error Handling: Implement proper error handling to catch and address exceptions.
Conclusion
By following these steps, you can successfully create and deploy a Telegram bot on your VPS. This provides you with greater control, flexibility, and scalability for your bot’s operations.
Creating a Telegram Bot on a VPS: A Step-by-Step Guide (F.A.Q)
What is a VPS?
A VPS (Virtual Private Server) is a virtualized server that provides a dedicated computing environment within a shared physical server. It offers more control and resources than shared hosting but is less expensive than a dedicated server.
How do I choose the right VPS provider?
Consider factors like pricing, performance, location, customer support, and scalability when selecting a VPS provider. Research different providers and compare their offerings to find the best fit for your needs.
Can I upgrade my VPS if my needs change?
Yes, most VPS providers offer options to upgrade your server’s resources (e.g., CPU, RAM, storage) as your requirements grow.This allows you to scale your VPS without having to migrate to a new server.


