Enable Remote Desktop Sound
Explore More; Beginner’s Remote Desktop Protocol (RDP) Handbook: Crucial Tips and Tricks
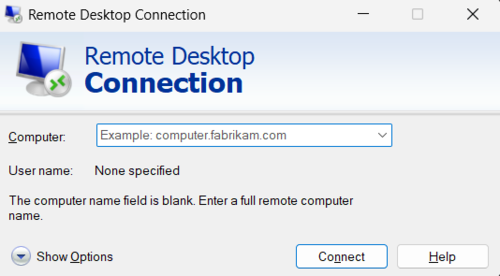
- Launch Remote Desktop:
- Open the Remote Desktop Connection application on your local machine. You can find it by searching for “Remote Desktop” in the Start menu.
- Verify Windows Audio Service:
- Ensure that the Windows Audio service is running on the remote computer. To do this, go to the Services app on the remote machine, find “Windows Audio,” and make sure it’s set to “Running.”
- Enable Audio in Remote Desktop:
- In the Remote Desktop Connection window, click on “Show Options” to expand the settings.
- Navigate to the “Local Resources” tab.
- Under the “Remote audio” section, click on “Settings.”
- Choose “Play on this computer” under “Remote audio playback” to ensure audio is redirected to your local machine.
- Adjust Remote Desktop Properties:
- Still in the “Local Resources” tab, ensure that the “Remote audio recording” is set to “Record from this computer” if you want to use your local microphone.
- Configure Audio for Applications:
- After connecting to the remote desktop, check the audio settings in the specific applications you are using (like media players or conferencing apps) to ensure they are set to use the default playback device.
Steps to Enable Remote Desktop Sound
Step 1: Fire up Remote Desktop
- Click on the Start menu or the Windows icon.
- To launch the Remote Desktop Connection application, in the search bar, type:
mstsc.exe
- Enter the IP address of your VPS and click “Connect“.
Step 2: Double-check the Windows Audio Service
- First, go to the Start menu, type “Services.msc,” and press enter.
- Next, find “Windows Audio” on the list and double-click on it.
- Then, if it’s not already set to “Automatic,” change the “Startup type” to “Automatic” and click “OK.”
- After that, hit the “Start” button to get the service running right away.
- Finally, try playing some audio on your VPS. If you hear it, then great! If not, move on to the next step.
Step 3: Turn on Audio in Remote Desktop
- First, open Remote Desktop and click “Show Options.”
- Next, go to the “Local Resources” tab and click “Settings” under “Remote Audio.”
- Then, set “Remote Audio Playback” to “Play on this computer.”
- Additionally, if you want to use the microphone on the remote computer, enable “Remote audio recording.”
- Finally, if you hear the startup sound when you log in to the VPS, skip to the next step of application configuration. If not, keep reading.
Step 4: Adjust Remote Desktop Properties (for remote computer):
- First, on the remote computer, open “tscc.msc.”
- Next, in the left panel, find the “Connections” folder and right-click on “RDP-Tcp.”
- Then, choose “Properties” and click on the “Client Settings” tab.
- After that, check the checkbox for “Audio Mapping.” By default, audio is disabled on Remote Desktop, so enable it here.
Finally, click “OK” and close the window. If you see a message saying the change won’t affect existing connections, click “OK” on that message, log out, and log back in. You should hear the startup sound now. If not, move on to the last step.
Step 5: Configure Audio for Applications
Let’s make sure all your applications on the VPS are set up for audio properly:
- Open the sound control panel on the VPS and go to the “Audio” tab.
- If it’s not already selected, choose “Microsoft RDP Audio Driver” as the default playback device.
- There’s a checkbox at the bottom that says “Use Default Devices Only“.
- Make sure that’s checked. Then go to the “Voice” tab and pick “Microsoft RDP Audio Driver” as the default playback system here as well.
- Click “OK” to save these changes.
That’s it! You should now be able to hear audio from your VPS through your local computer whenever you use Remote Desktop.
Remote Desktop sound troubleshooting
- Check if the Windows Audio service is running on both the local and remote machines.
- Enable “Remote Audio Playback” in your local machine’s Remote Desktop settings.
- Enable “Remote Audio Recording” if you need microphone access.
- Ensure audio is configured correctly within your VPS applications.
- Consider restarting your computer or updating audio drivers if you’re still having trouble.
There are several reasons why you might not hear audio:
- Ensure the Windows Audio Service is running on both your local and remote machines.
- Check if “Remote Audio Playback” is enabled in your local machine’s Remote Desktop settings.
- Enable “Remote Audio Recording” if you need microphone access.
- Configure applications on the remote machine to use the “Microsoft RDP Audio Driver” for playback and recording
How do I enable audio playback on Remote Desktop?
On your local machine, open Remote Desktop settings, go to “Local Resources,” and under “Remote Audio,” select “Play on this computer” for “Remote Audio Playback.”
How do I enable microphone access on Remote Desktop?
In the same Remote Desktop settings as above, under “Remote Audio,” enable the option “Remote Audio Recording.”
However, this feature might be limited on server versions of Windows.


