We are at your disposal by teaching you how to change the SSH port in your CentOS operating system. The default port for the service is 22, and if you use port 22 by default, hackers can attack your server through port 22 and take control of it or cause irreparable damage. there is. So I recommend changing the default SSH port to increase the security of your server.
What is SSH?
SSH stands for Secure Shell and is a free version of a connection tool that allows secure connections to networks. This tool encrypts all transmitted data, including passwords, eliminating the possibility of other users accessing your network data. It is a standard protocol for encrypted information exchange over a network. The service software also provides remote access to computers on your network. SSH refers to the Secure Shell protocol and ssh means remote communication software. One of the free SSH connection software called Putty allows you to connect to your Linux server with ease.
Typical uses of the SSH protocol
The protocol is used in corporate networks for:
- Providing secure access for users and automated processes
- Interactive and automated file transfers
- Issuing remote commands
- Managing a network infrastructure and other mission-critical system components.
Considerations before changing the default port
- We recommend specifying a 4-5 digit port. Also, don’t forget to use the free ports.
- Likewise, if your data center network uses a firewall, tell the data center which ports to open. Be sure to make a note of the port you assign to SSH.
- Make sure to remember the changed SSH port as forgetting it can cause problems accessing the server.
- If you’re not using SELinux, you should simply disable it to avoid further errors.
Steps to change default port on CentOS
- Login to your Linux VPS using Putty
- Modify SELinux permission to disabled
- Edit the sshd_config file and change port 22 to the desired port.
- Restart the sshd service.
- Connect to the server using Putty, you can use the educational links below to learn how to connect to your Linux VPS using Putty.
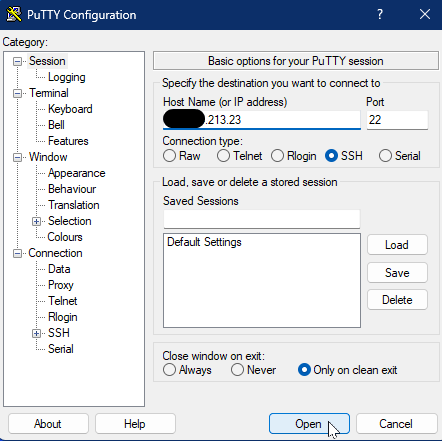
Login to your Linux Server using PuTTY
Open the application enter your server IP and click Open. Now sign in with your details.
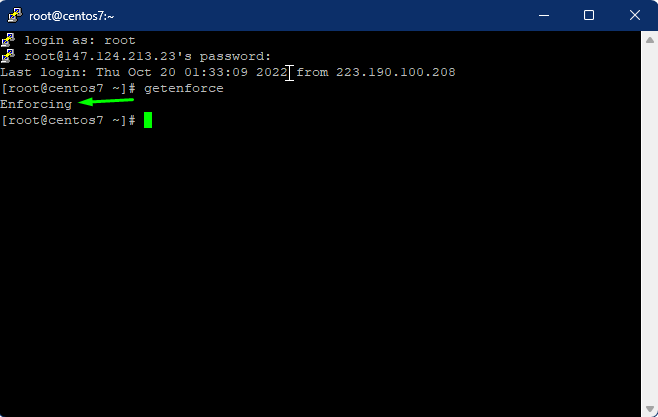
Check And Modify SELinux Mode to disabled
Enter the given commands to check the current SELinux mode.
# getenforce
The main configuration file for SELinux is /etc/selinux/config. Enter the given commands to edit the /etc/selinux/config file and change the SELinux directive to disabled. Edit the file using the Insert command, and save the file using wq.
# vi /etc/sysconfig/selinux

Configuring SSH file
On CentOS, the SSH server and client configuration files are in the /etc/ssh directory. To edit the sshd_config file enter the given command. Enter your desired port number and save the file.
# vi /etc/ssh/sshd_config

# firewall-cmd –add-port=3389/tcp –permanent
# firewall-cmd –reload
Restart the SSH service
Now enter the given command to restart the sshd service.
# systemctl restart sshd

Connect the server
Now your Linux server should run on port 3389.
Conclusion
That’s it after this, you can easily change the default port by editing the sshd_config file, you can also add a ListenAddress to make it more secure. The only thing to watch out for is to add the new port number to your firewall before applying the new settings to avoid disrupting server functionality.


