Hello, users Deadpool here. In the past decade, GPU technology has evolved to deliver awesome benefits to computing. Similarly, the computing architecture has also evolved from traditional computing to cloud services. However, today’s graphic, video rendering, and creative applications still need the help of the GPU for parallel processing to accelerate the rendering of 3D objects. Combing the modern power of the cloud and GPU parallel processing, it’s getting easier to achieve your creativity. Big applications used over the Remote Desktop Protocol often require GPU rendering. Windows Server 2019 RDP does not support this option by default. It must be enabled by the Group Policy Editor before working with rendering applications to prevent any errors related to the Direct X and GPU drivers. To use GPU rendering instead of the default Microsoft Adapter in RDS on Windows 2012 and later, follow these steps.
Let’s enable the GPU Rendering option:
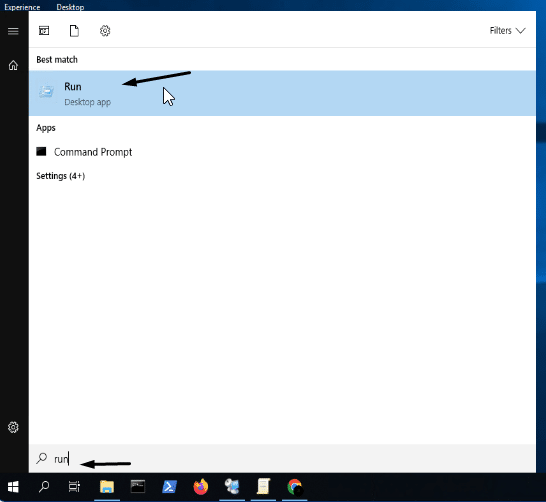
- Connect the Windows 2019 GPU Server. Go to the Start menu and search for “run” or press “Windows + R”.
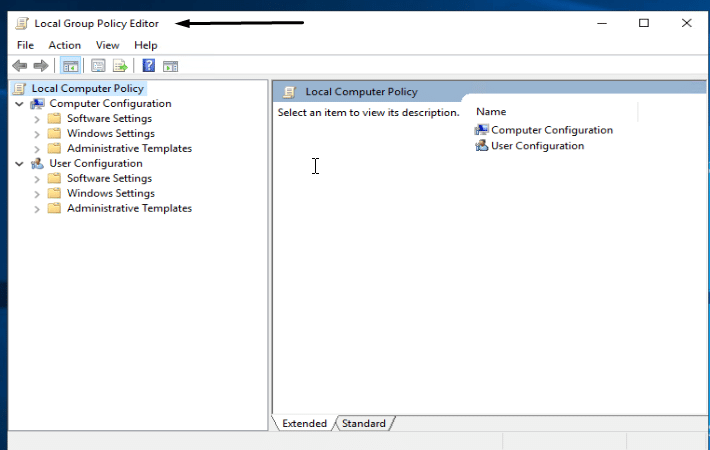
- Type in “gpedit.msc” and press Enter.

- You will enter the Local Group Policy Editor window.
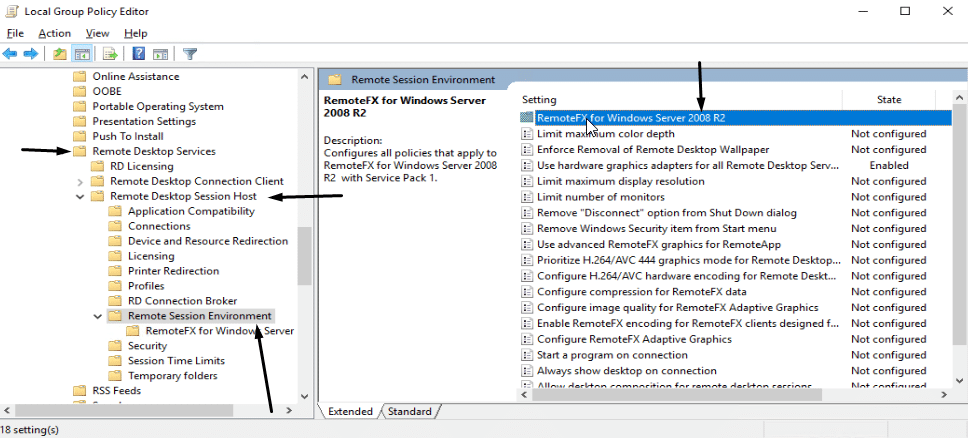
- In the navigation pane, go to the given path. Computer Configuration > Administrative Templates > Windows Components > Remote Desktop Services > Remote Desktop Session Host > Remote Session Environment
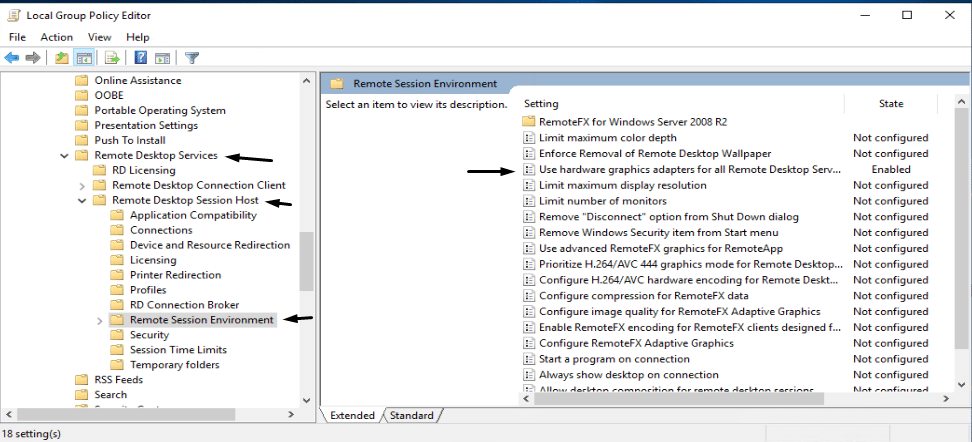
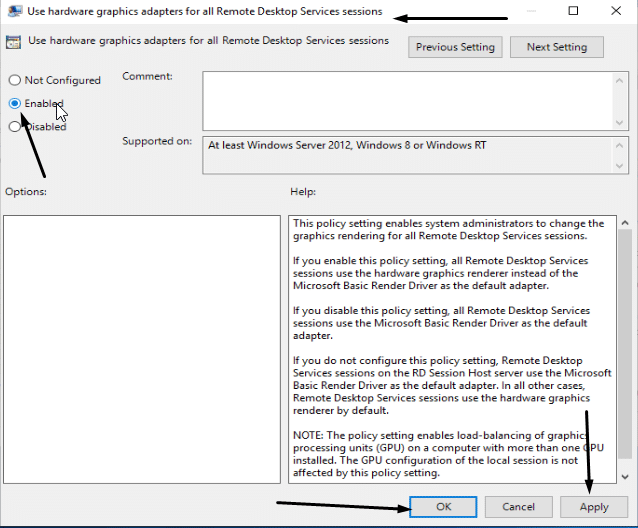
- In the description pane, right-click the option “Use the hardware default graphics adapter for all Remote Desktop Services sessions” and select edit.
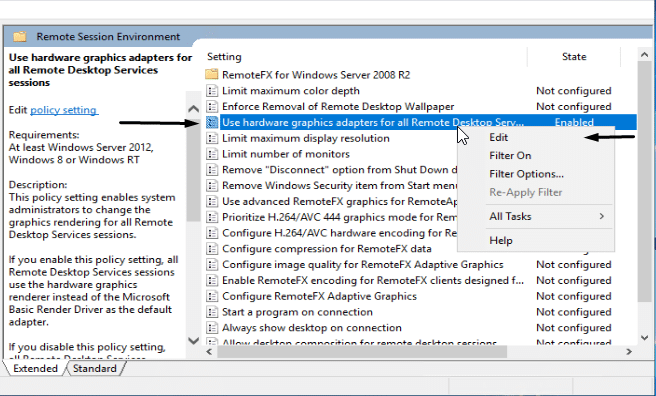
- Select “enabled” and Apply it.
To enable the Remote FX option, follow the given steps:
- In the Navigation pane, go to the given path “Computer Configuration >Administrative Templates > Windows Components > Remote Desktop Services > Remote Desktop Session Host > Remote Session Environment > RemoteFX for Windows Server”
- Edit the option “Configure RemoteFx” and enable it.

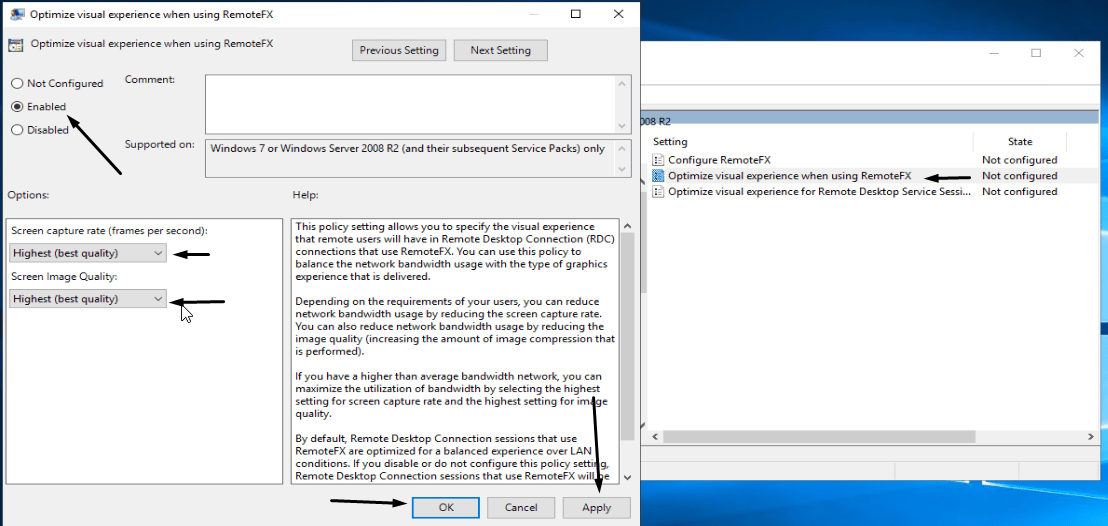
- Edit the option “Optimize visual experience when using RemoteFX” and enable it.
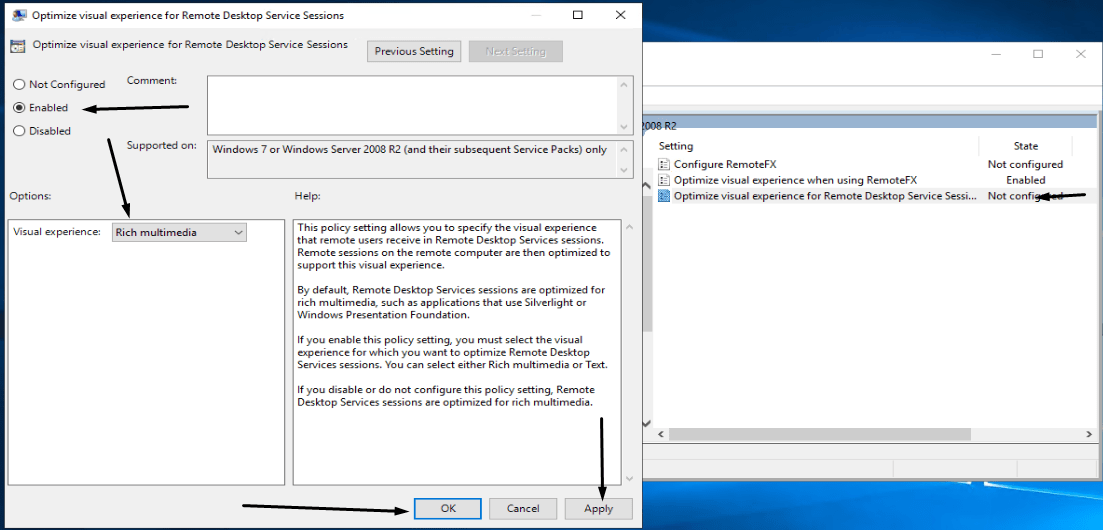
- Do the same for “Optimize visual experience for Remote Desktop Service Sessions”.
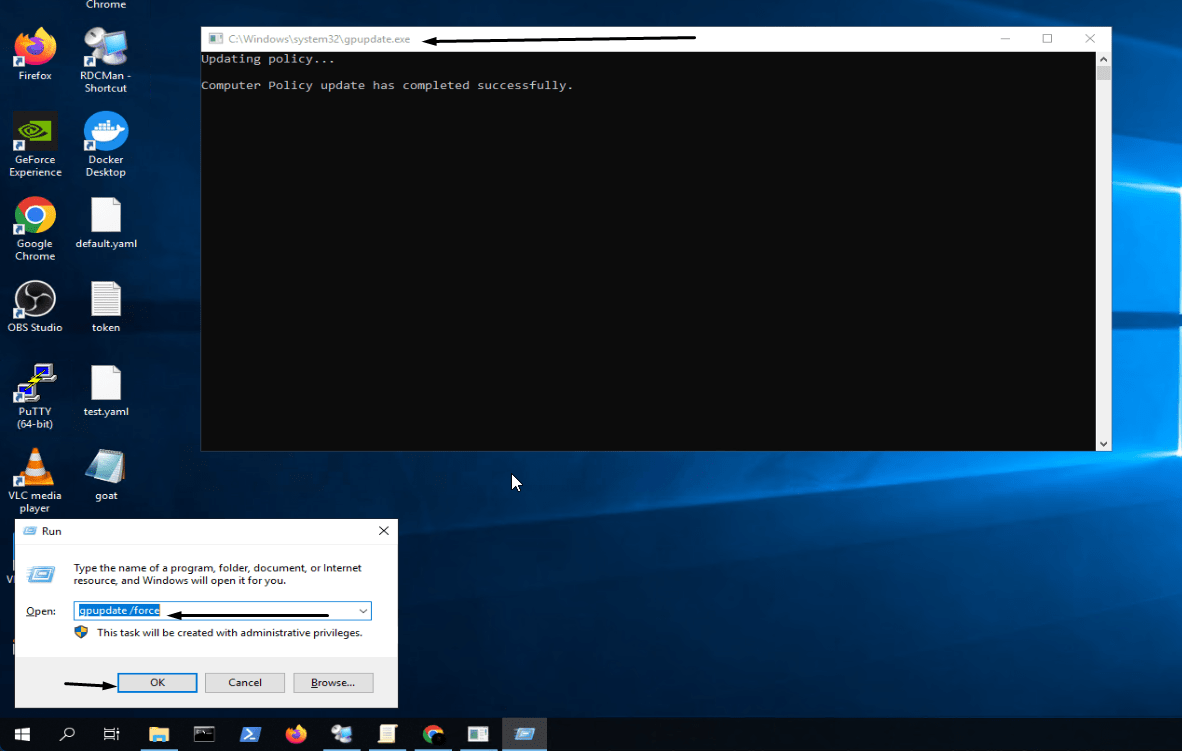
- Now open the run again and force apply all the policies using “gpupdate /force”, and restart the server.
That’s it, GPU Rendering is enabled for Remote Desktop Sessions. Now you can use the Remote Desktop Session with much better visual, experience and performance. Thank You for the time.


