
Introduction:
Ubuntu is a widely used Linux distribution known for its stability, security, and ease of use. One of the essential tools for managing files and archives on Ubuntu is 7Zip. 7Zip is a free and open-source file archiver utility that can handle various compression formats. In this guide, we’ll walk you through the steps to install 7Zip on Ubuntu.
Step 1: Update Package Lists
Before installing any new software on Ubuntu, it’s always a good idea to ensure that your package lists are up-to-date. Open a terminal by pressing Ctrl+Alt+T and run the following command:
sudo apt update
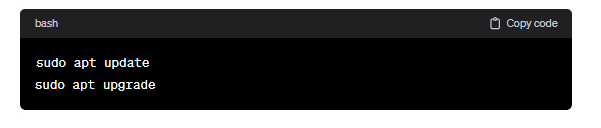
This command will refresh the list of available packages from the repositories.
Step 2: Install 7Zip
Once the package lists are updated, you can proceed to install 7Zip. In Ubuntu, 7Zip is available in the official repositories, so you can install it using the apt package manager. Run the following command in the terminal:
sudo apt install p7zip-full p7zip-rar

This command will install both the 7Zip utility (`p7zip-full`) and the RAR support (`p7zip-rar`). RAR support is necessary if you intend to work with RAR archives.
Step 3: Verify Installation
After the installation is complete, you can verify whether 7Zip has been installed successfully by running the following command:
7z –version

This command will display the version of 7Zip installed on your system along with other information.
Step 4: Basic Usage
Now that 7Zip is installed, you can start using it to compress and extract files. Here are some basic commands to get you started:
– To compress a file or directory into a 7z archive:
7z a archive.7z file1 file2 directory

– To extract files from a 7z archive:
7z x archive.7z

– To view the contents of a 7z archive:
7z l archive.7z

Step 5: Uninstalling 7Zip (Optional)
If you ever need to uninstall 7Zip from your Ubuntu system, you can do so using the following command:
sudo apt remove p7zip-full p7zip-rar

This command will remove both 7Zip and its RAR support from your system.
Conclusion:
In this guide, we’ve covered the steps to install 7Zip on Ubuntu, one of the most popular Linux distributions. With 7Zip installed, you can efficiently manage and manipulate archives with ease. Whether you need to compress files for storage or extract contents from archives, 7Zip provides a reliable solution for your file archiving needs on Ubuntu.
How to Install 7Zip on Ubuntu (F.A.Q)
Is 7Zip compatible with all compression formats?
While 7Zip is primarily known for its support for the 7z format, it can handle various other compression formats such as ZIP, TAR, GZIP, and more. Additionally, with the installation of the p7zip-rar package on Ubuntu, 7Zip can also work with RAR archives.
Can I use 7Zip from a graphical interface on Ubuntu?
Yes, there are graphical interfaces available for 7Zip on Ubuntu, such as p7zip-full. Once installed, you can access the graphical interface by searching for “7Zip” in your applications menu.
Does 7Zip provide encryption options for archives?
Yes, 7Zip offers encryption options to secure your archives. When creating a new archive, you can specify a password to encrypt its contents. This ensures that only users with the correct password can extract the files.


