PHP is a general-purpose scripting language for web development. Created in 1993 by Danish-Canadian programmer Rasmus Lerdorf and released in 1995. PHP code is generally processed on a web server by a PHP interpreter implemented as a module, daemon. On a web server, the interpreted and executed results of PHP code forms part of the HTTP response. In this guide we will see how to install PHP with a web server on Ubuntu 20.04.
Requirement
- 99RDP VPS (Running Ubuntu 20.04)
- Terminal Access
Steps To install PHP With Apache Web Server
First update the software package and repo list to avoid any errors. Run the given commands in terminal to update them.
# apt update && apt upgrade -y
Once the process is finished, lets add the software-properties-common scripts which help us easily manage distribution and independent software vendor software sources.
# apt install software-properties-common
After that we are going to add ondrej repo which will give us the freedom to choose from different PHP versions.
# add-apt-repository ppa:ondrej/php
Once the repo is added run the apt update command again to refresh the repo list. Once it is done we can install the apache web server which will later help us interpret PHP codes.
# apt install apache2 -y
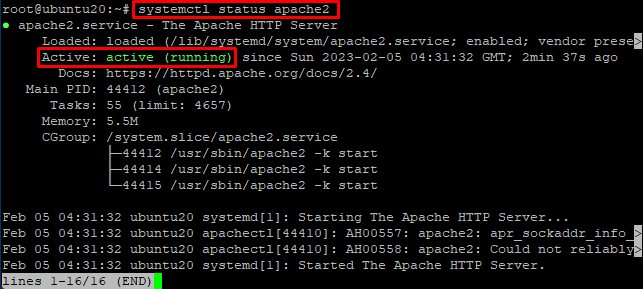
Now verify the installation using the given command, which will output the service as running.
After that lets install the required package PHP installation. Once it is done we can proceed with the PHP installation To install the required packages and PHP type in the given command in terminal with the PHP version of your choice. For this guide we are going to use the version 8.1.
# apt install php8.1-fpm php8.1-common php8.1-mysql php8.1-xml php8.1-xmlrpc php8.1-curl php8.1-gd php8.1-imagick php8.1-cli php8.1-dev php8.1-imap php8.1-mbstring php8.1-soap php8.1-zip php8.1-bcmath -y
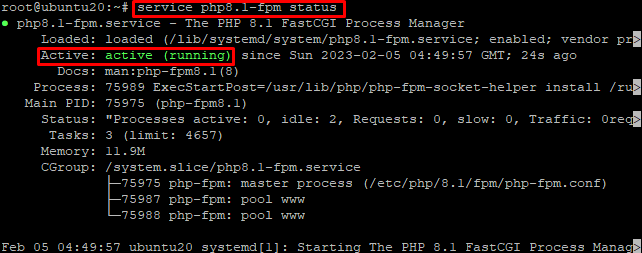
Verify the installation by checking the PHP version command.
# service php8.1-fpm status
Configure PHP-FPM For Apache
Once the installation is finished disable the default host configuration for apache. And enable the apache event module.
# a2dissite 000-default
# a2enmod mpm_event proxy_fcgi setenvif
Once it is done enable the PHP-FPM and HTTP configuration by running the given commands. And restart the service to load the configuration.
# a2enconf php8.1-fpm
# a2enmod http2
# service php8.1-fpm restart
Once the service is restarted configure the apache vhost file for PHP. To do so create a new host file using nano.
# nano /etc/apache2/sites-available/domain.conf
Enter the given configuration to that file and save it.
<VirtualHost *:80>
ServerName domain.com
ServerAlias www.domain.com

Protocols h2 http/1.1

DocumentRoot /var/www/html

<Directory /var/www/html>
Options -Indexes +FollowSymLinks
AllowOverride All
Require all granted
</Directory>

ErrorLog ${APACHE_LOG_DIR}/error.log
CustomLog ${APACHE_LOG_DIR}/access.log combined
</VirtualHost>
The given configuration file directs apache to check the PHP file from the location /var/www/html. Enable this new configuration and restart the apache service.
# a2ensite domain.conf
#service apache2 restart
Now as the /var/www/html is configured as web root, we need to create a phpinfo file to verify the setup. Go to the directory using the cd command.
# cd /var/www/html
Create a new phpinfo file using nano, paste the following symlink to that file and save it.
# nano info.php
# <?php phpinfo();
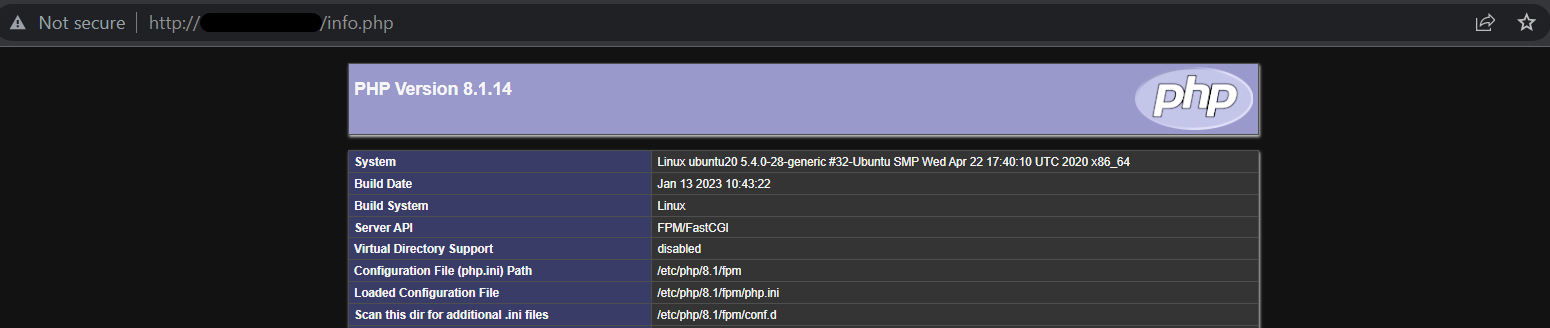
Now go to your browser and paste the given link replacing the serverIP with your IP. A PHP information page will appear, confirming that Apache is using PHP-FPM.
http://serverIP/info.php
Conclusion
In this guide we learned how to install PHP on Ubuntu 20.04 with Apache web server. You also learned how to set up PHP-FPM and configure host file for Apache. Thank You for your time.


