Looking at how to Blocking IPs in Windows Firewall!
Well, you’ve reached the right blog.
As per our understanding, there can be two situations while you might be looking to block an IP in Windows Firewall.
- Case 1: When you want to block only a single IP
- Case 2: When you aim at blocking multiple IPs
With the steps below, along with self-explanatory screenshots, we’ll be learning to block specific IPs to access the applications in any server.
So, without due, let’s understand these methods in detail.
Case 1: For Blocking Single IP
Step1: Open Windows Firewall with Advanced Security.
You have to be on the Server Manager- Dashboard to reach out to the ‘Windows Firewall with Advanced Security.’
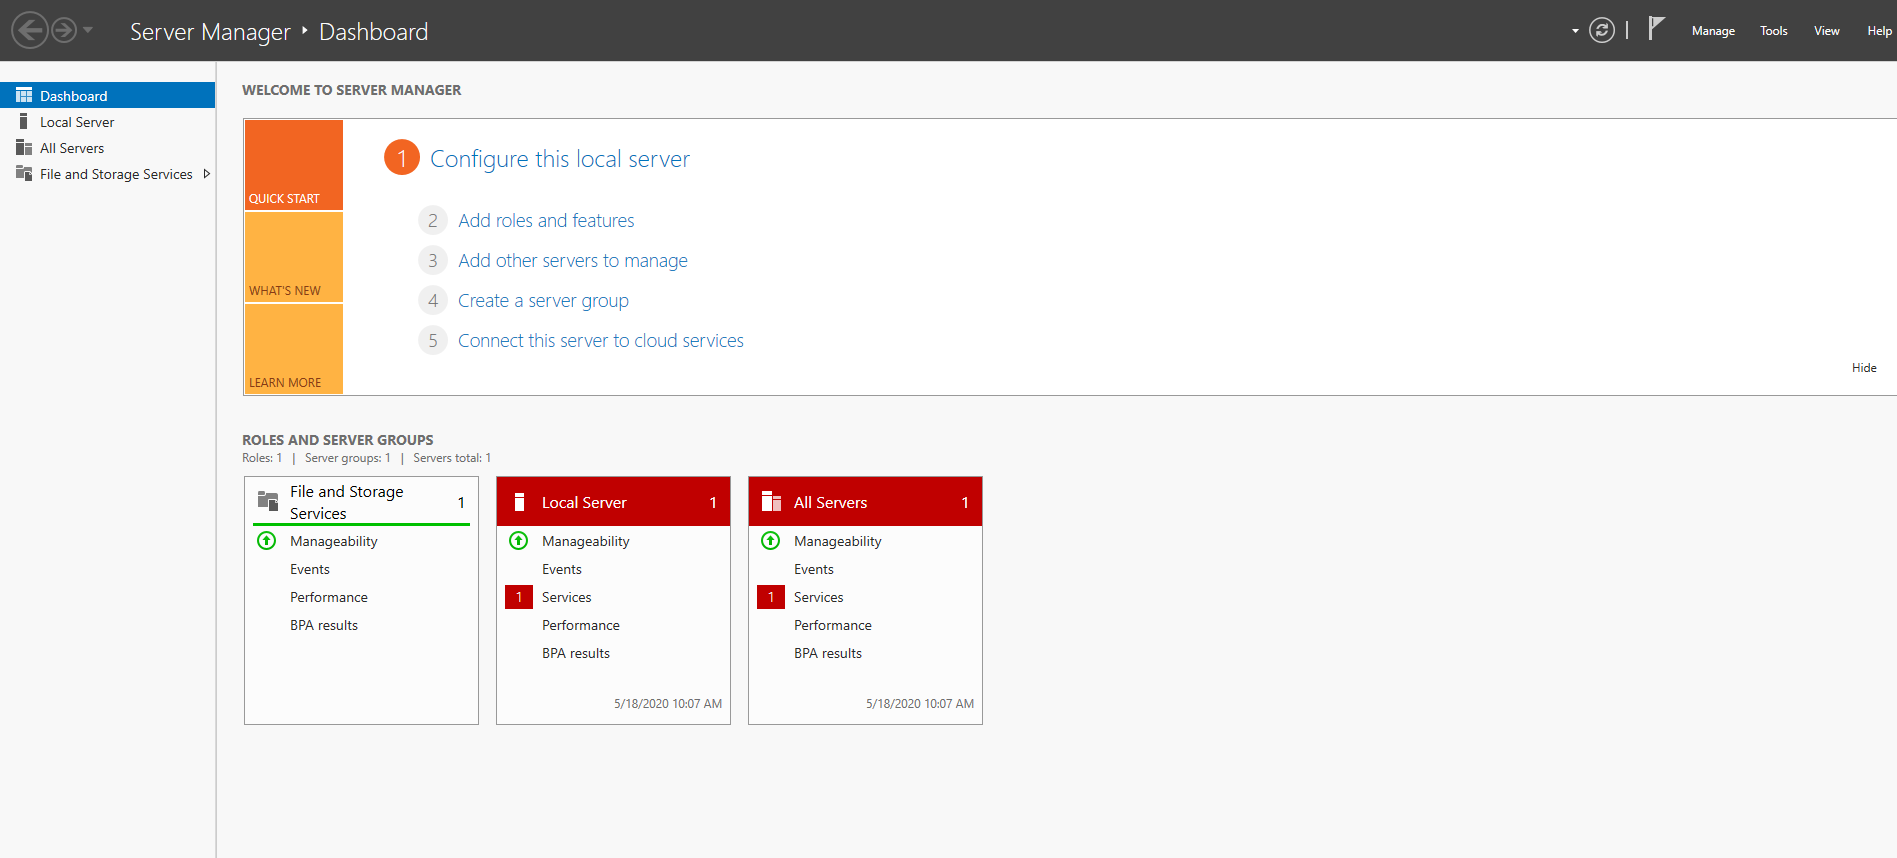
If you’re on the Server Manager-Dashboard, then you’ll have to click on the ‘Tools’ option on the extreme top right corner of the screen.
The ‘Tools’ option can be easily spotted between ‘Manage’ and ‘View’ on the extreme top right.

Click on it and then select ‘Windows Firewall with Advanced Security’ from the dropdown.
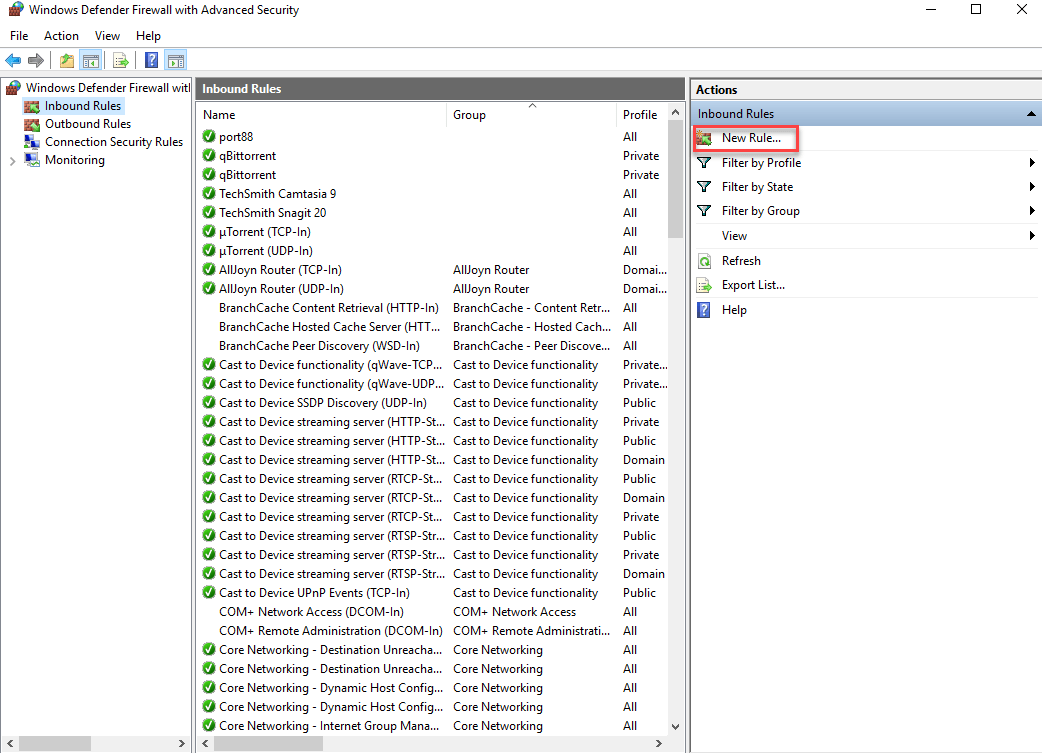
Step2: Create a New Rule.
On the right column, you’ll locate an option of ‘Inbound Rules.’
Right-click on ‘Inbound Rules’ and then select the first option ‘New Rule…’
A new window similar to the below screenshot will pop up!
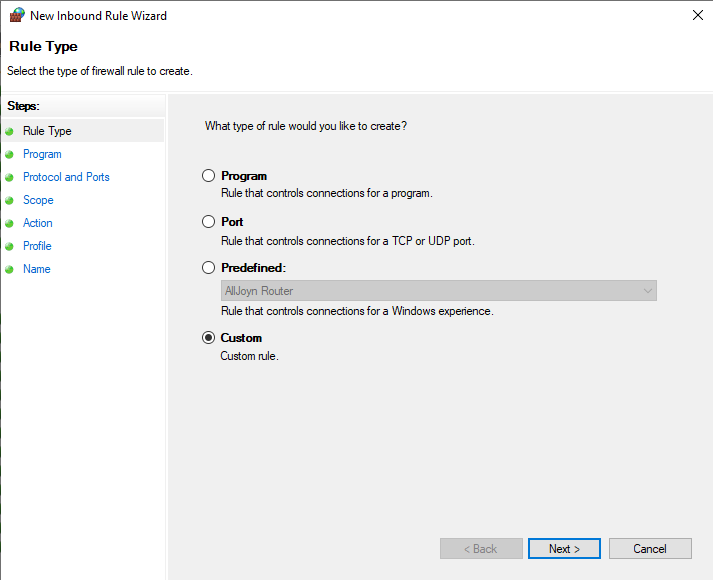
Step3: Customizing a New Rule to Block the IPs
Now, to create a new rule, you’ll have to select and finalize various fields.
The first one is Rule Type, for which you’ll click on the ‘Custom’ option.
Step 4: Choosing the Programs
With the next field, you can either choose ‘All programs’ (Recommended), or if you desire to block only a specific program path, then you can select the other option as well.
Also, you might block specific services to IPs as well, do let us know in the comment section if you want to learn more about it! (Our team will help you with it).

Step 5: Finalizing the Protocol and Ports
You will have to check that the Protocol type in this section is selected to ‘Any,’ just as the screenshot below.
This finalizes the ports and protocols for which this new rule (that you’re in the process of creating) will apply to.
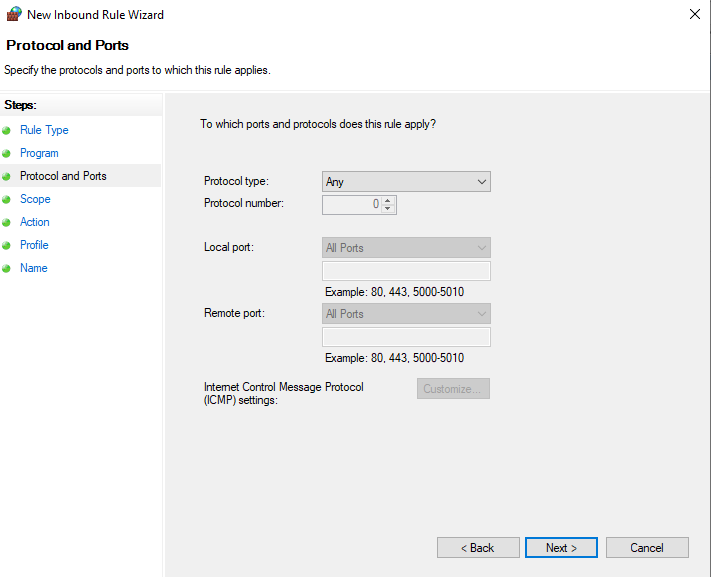
Rest all fields are pre-marked, so no need to edit them.
Step 6: Adding the to be blocked, Special IP
Within the Scope filed, you’ll have to select the highlighted ‘Add’ option (in the below screenshot) for the question ‘Which remote IP addresses do this rule apply to?’
Checkmark the ‘These IP addresses’ option and then click on ‘Add.’
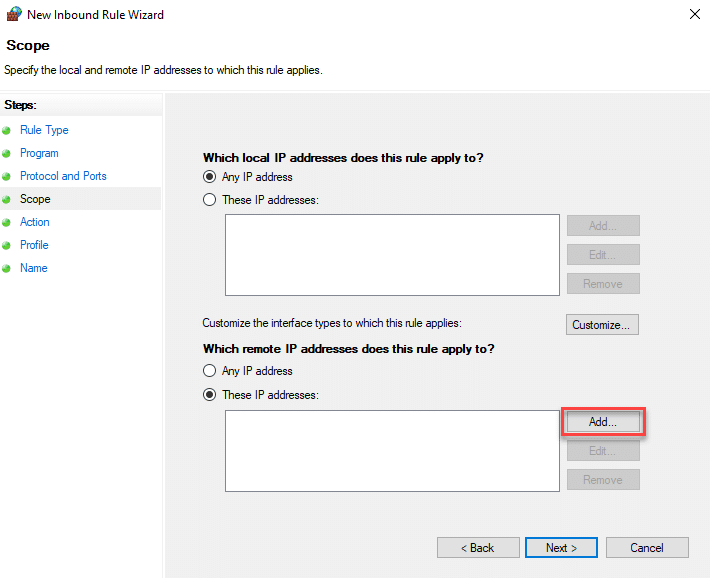
A new pop-up with ‘IP Address’ will be displayed.
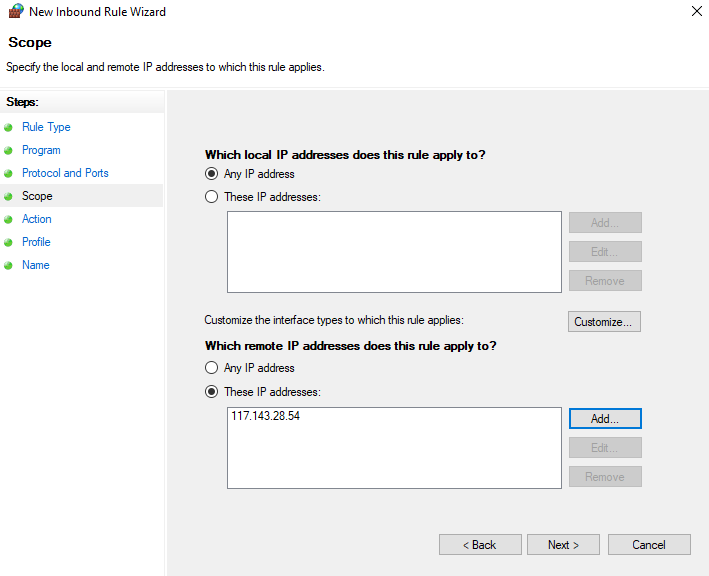
Step 7: Add the Special IP or IP Rage
Now, enter the required IP number in the ‘This IP address or subnet’ field.
Click ‘OK’
Then, click ‘Next’ to move from the Scope field to the Action field.

Step 8: Select’ Block the Connection’
Now, in the Action field, you will have to choose the ‘Block the Connection’ option to block all the access of this IP in the Windows Firewall.
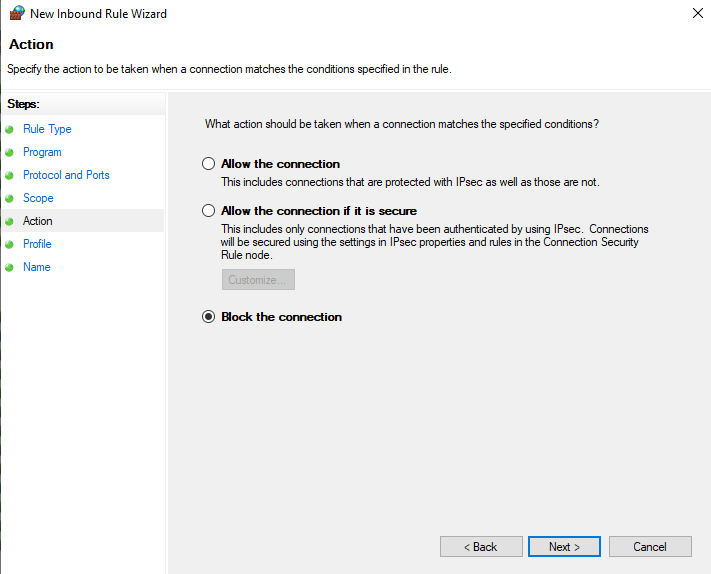
Click ‘Next’
Step 9: Choosing to Applicability of the Rule
Under the profile field, you’ll have to choose the options under which this rule will be applicable.
You’ll be served with three options on screen:
- Domain
- Private
- Public
It’s recommended to choose all three if you’re trying to block the IP permanently. Else, you can select the relevant ones (as per your need).
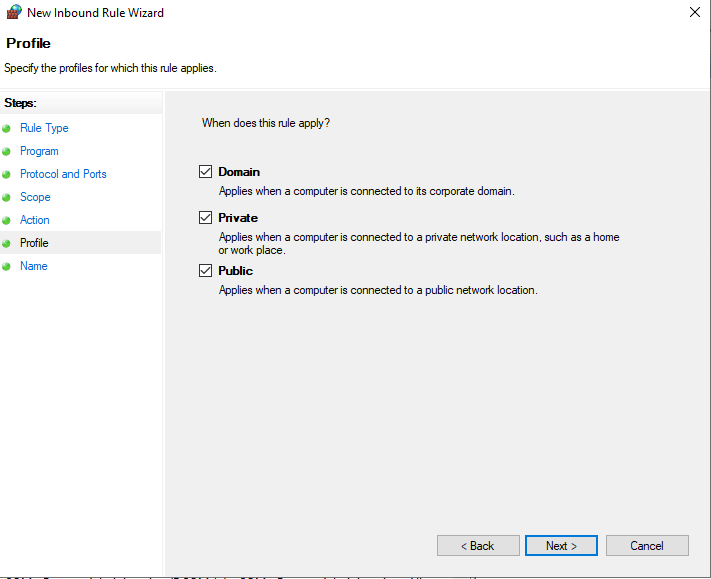
Click on ‘Next’
Step 10: Finally! The Name of the Rule.
The final step is to name the rule you have just created.
You can even add a description.
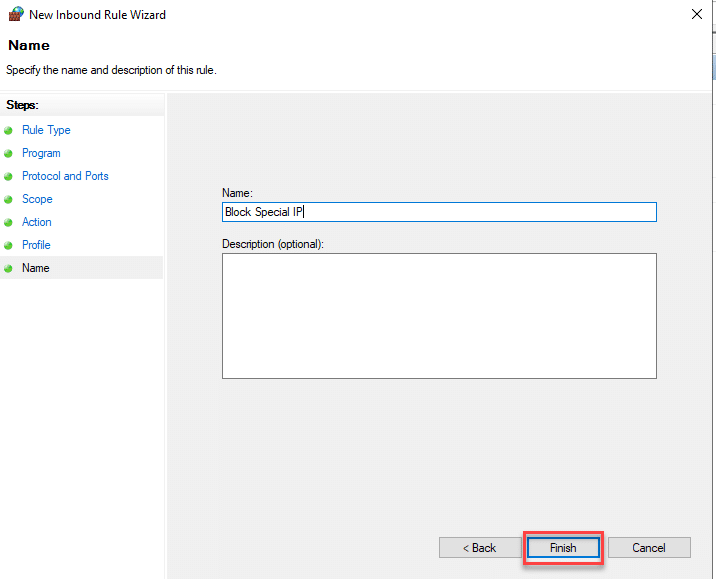
Click on ‘Finish’
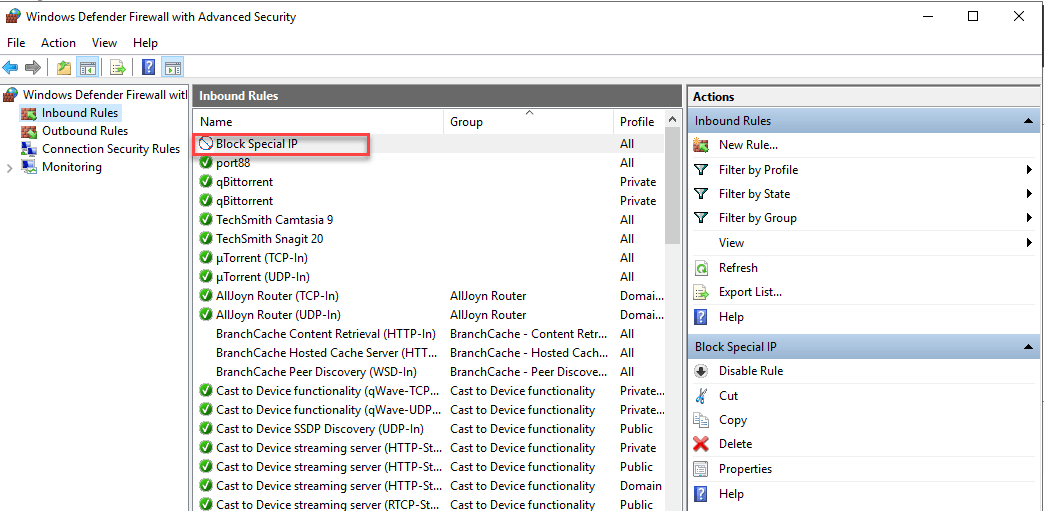
Once you click on ‘Finish,’ you’ll be brought back to the original window, and you’ll notice that a new Inbound rule has been added to the list.
Case 2: Blocking Multiple IPs
If you’re to block multiple IPs, then the above process can prove to be a time taking one. You’ll have to enter individual IDs numerous times.
But we can help you a seamless and effective way to block multiple IPs, all at once.
Let’s begin!
Step1: Creating a .txt file of IP addresses
Yes, if there are many IPs you want to block, then add all those IP addresses in a .txt file.
Name this .txt file as IP.txt.
You can do this through a simple Notepad application.
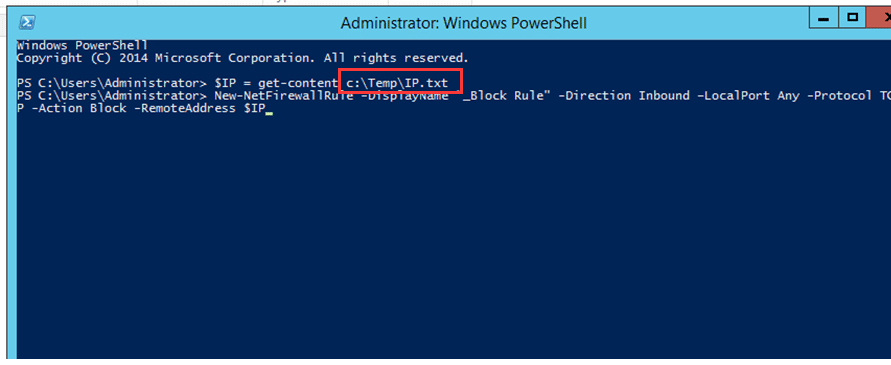
Step2: Run the Powershell Script
Now, select the following Powershell script and then run it on Powershell.
2.1 For Windows Server 2008
$IP = get-content c:\IP.txt
netsh advfirewall firewall add rule name=”_Block Rule” dir=in action=block protocol=TCP localport=any remoteip= $IP
or
netsh advfirewall firewall add rule name=”_Block Rule” dir=in action=block protocol=TCP localport=any remoteip= “IP1,IP2,IPX”
2.2 For Windows Server 2012 or 2016
$IP = get-content c:\IP.txt
New-NetFirewallRule -DisplayName “_Block Rule” -Direction Inbound –LocalPort Any -Protocol TCP -Action Block -RemoteAddress $IP
or
New-NetFirewallRule -DisplayName “_Block Rule” -Direction Inbound –LocalPort Any -Protocol TCP -Action Block -RemoteAddress IP1, IP2, IPX.
We hope this blog was helpful for you!
Let us know if you have any queries around this?