How To Start Microsoft Store Client In RDP
Read this article to learn about, ‘How To Start Microsoft Store Client In RDP’.
How To Start Microsoft Store Client In RDP
To access your Windows desktop and applications from another Windows machine, you can download the Remote Desktop client.
Get the RDP client and begin work with it
Here’s how to set up Remote Desktop on a Windows 10 machine:
a) Visit the Microsoft Store to get your hands on the Remote Desktop client.
b) Prepare your computer to receive connections from elsewhere.
c) Create a new workspace or link to a remote computer. To access an administrator-published RemoteApp software, session-based desktop, or virtual desktop, you must first establish a connection to a Windows PC and a workspace.
d) Stick things on the board to make Remote Desktop easier to access.
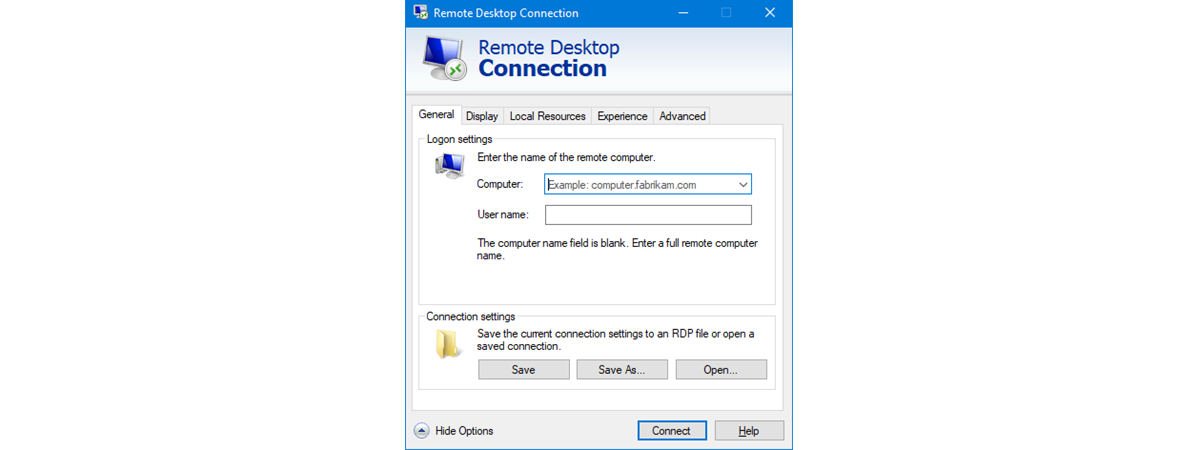
Add a Remote PC connection
Initiating a Remote PC Connection Requirements
- You can add computers by tapping the plus sign (+) in the Connections tray.
- Connecting to a computer requires that you provide the following details:
PC Name: What we call a computer when we refer to it by its name. The PC name can be an IP address, a domain name, or a Windows computer name. The PC name might also include the connected port (for example, MyDesktop:3389 or 10.0.0.1:3389).
Username: The name of the user on the local machine who will be logging into the remote one. Select an existing account, or add a new one, by tapping the plus sign. You can use a user name, domain username, or user name@domain.com as the username. When establishing a connection, you have the option of being prompted for credentials at regular intervals or never.
3. When you click the Show more button, you’ll have access to even more customization options.
a) Display name: Name displayed on the screen while connecting to a computer. You have free reign over the string you use, but if you don’t give your PC a pleasant moniker, that will show up.
b) Group: Use the group feature to categorize your contacts for later reference. Create a new group by tapping +, or choose from the drop-down menu.
c) Gateway: Connect to internal corporate networks via Remote Desktop Protocol sessions, RemoteApp applications, and virtual PCs over the Gateway. Ask your system administrator for gateway details.
d) Connect to Admin session: To access a console session for Windows server administration, select the “Connect to admin session” option.
e) Swap mouse buttons: Turning this option on will switch the functionalities of the left and right mouse buttons. When using a computer designed for a left-handed user with a right-handed mouse, the mouse buttons must be switched.
e) Choose my Remote session resolution: I want the resolution of my remote session to be — pick the session’s key before beginning. The client’s size will determine the resolution you choose for me.
f) Change the display size: Expand or reduce the screen size: to make text and other on-screen elements easier to read, set this to a high static resolution for the session. It’s important to note that this option is only available for use with Windows 8.1 and later versions while connecting.
g) Modify the resolution of the Remote session on resize: Change the resolution of the remote session when it’s resized. The client will adapt the session resolution to its current size when this option is on. If you’re using Windows 8.1 or later for your connection, you won’t be able to use this option.
h) Clipboard: When enabled, the clipboard feature of a remote PC lets you copy and paste text and images between computers.
i) Audio playback: You can tailor your remote session’s aural experience by selecting an audio output device. You have the option of hearing the music on your local devices, on the distant PC, or not at all.
j) Audio recording: When this option is activated, you can record audio using a microphone on your local machine and play it back using the remote PC.
4. Click the Save button.
You’ll need to make some changes to these options, right? Select Edit from the drop-down menu that appears after clicking the three dots () next to the PC’s name.
If you need to delete the connection, then click the overflow menu (…) again, and click on Remove, after that.
CONCLUSION
After reading this article, you might have got a good idea about, How To Start Microsoft Store Client In RDP. You can also read this article to learn about, Remote Desktop — Allow access to your PC from outside your PC’s network.
You can read this article also, to get knowledge about, how to buy Admin RDP.
Visit our website, 99rdp.com to know about the pricing plans of different types of RDP.