
Reinstalling Ubuntu Linux can become necessary for a variety of reasons, such as system performance issues, software conflicts, or a desire for a clean slate. In this comprehensive guide, we will walk you through the step-by-step process of reinstalling Ubuntu, ensuring that you can do it with confidence and minimal stress. Let’s get started.
I wish I could tell you that starting again solves every issue, but that is untrue. So let’s just learn how to fix your system’s issues by reinstalling Ubuntu Linux. Reinstalling your OS may be useful if you encounter problems like failed upgrades, driver problems, GRUB loader errors, and more. It’s possible that reinstalling wasn’t the real solution after all, but it makes sense to go with this quick and simple method to solve the issue.
Given that Ubuntu is a dependable and contemporary distribution, customers might never have a significant issue. However, when installing Ubuntu alongside Windows 10, for instance, customers could have certain problems. Come along as we go over every step needed to reinstall Ubuntu with this tutorial.
Because Ubuntu is a contemporary and dependable distribution, users might never have a significant issue. However, after installing Ubuntu in addition to Windows 10, customers could experience certain problems. Join us as we go over each step needed to reinstall Ubuntu by reading this article.
Why Reinstall Ubuntu Linux?
Before diving into the reinstallation process, it’s crucial to understand why you might need to do it. Common reasons include:
- System Performance: Over time, your system may accumulate clutter and slow down. Reinstalling Ubuntu can rejuvenate your system’s performance.
- Software Conflicts: If you encounter software conflicts or strange behavior, a fresh installation can resolve these issues.
- Clean Slate: Sometimes, you just want a clean slate with no residual files or configurations.
Is It Time to Reinstall Ubuntu?
Installing an operating system built on Ubuntu is not difficult at all. You’ll come to agree with me in the end. Let’s master the process of reinstalling Ubuntu Linux by following the instructions in this article.
1. Establish a backup
I think it’s possible to make up for missing your first date, but not to forget to prepare a backup plan! Even though there aren’t many complaints of destroyed files following an Ubuntu reinstallation, it’s nevertheless advised that you make a backup copy of all your vital files and data on an external disk or USB. When the reinstall is complete, you will have your files and settings in the home directory.
Programs installed within the system directory won’t be retained upon reinstallation. Thus, be sure to support them.
ALSO READ : Vim vs. Nano: An In-Depth Comparison
2. Install Ubuntu
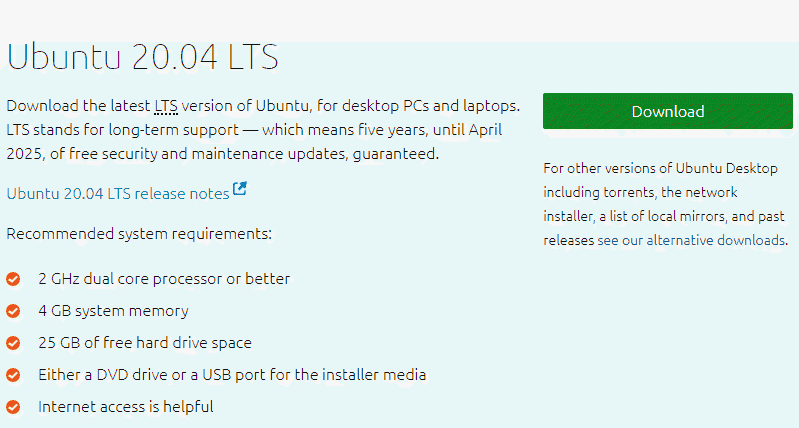
Navigate to the official Ubuntu download website and select your preferred Ubuntu version by clicking the Download button.
3. To create a live USB in Ubuntu, use the Startup Disk Creator program.
You will require a USB drive that is 4 GB in size or greater, as we indicated in the requirements section. While you still have access to your computer, insert the USB into the USB port and search for “Startup Disk Creator” to build a live USB in Ubuntu. Next, take each of the following actions one at a time:
3-1. Click the Other… option after selecting the intended USB device in the Disk.
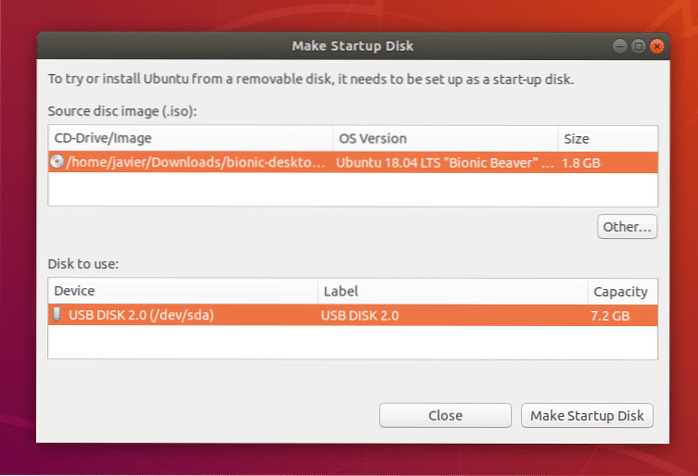
3-2. Next, choose the Make Startup Disk button to enable the creation of the Live USB.
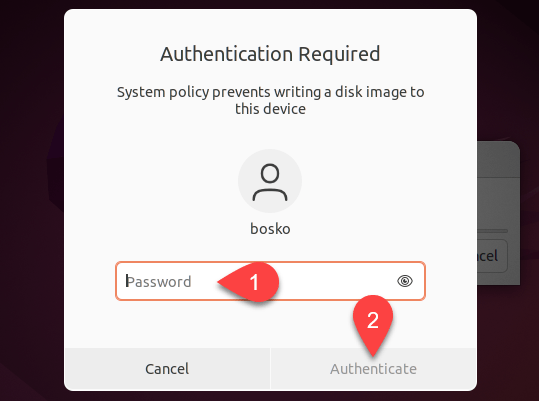
3-3 . Click Yes, type in the administrator password, and then click Authenticate when requested.
An information message indicating that the installation is finished appears when the utility has finished writing the image to USB. To exit the dialog box and continue with the instructions for reinstalling Ubuntu, click Quit.

Backup Your Data
Creating a Backup Strategy
Before proceeding, back up your important data to prevent any loss during the reinstallation process. You can use external drives or cloud storage for this purpose. Make a checklist of files and directories to ensure you don’t forget anything.
Preparing Installation Media
Downloading Ubuntu ISO
To reinstall Ubuntu, you’ll need to download the Ubuntu ISO file from the official website. Choose the version that suits your needs, and ensure it’s the same or newer than your existing installation.
Creating a Bootable USB Drive
After downloading the ISO, create a bootable USB drive. Tools like Rufus on Windows or Etcher on Linux make this process straightforward. You will use this USB drive to install Ubuntu.
Boot from Installation Media
Changing Boot Order
Restart your computer and enter the BIOS/UEFI settings. Change the boot order to prioritize the USB drive. Save your settings and exit. Your computer will now boot from the USB drive.
Selecting Installation Options
Once the USB drive boots, you’ll see the Ubuntu installation menu. Choose “Install Ubuntu” to begin the process. You can also explore the live session before installing.
Partitioning Your Hard Drive
Manual vs. Automatic Partitioning
During the installation, you will be asked to choose between automatic and manual partitioning. If you’re unsure, choose automatic for a hassle-free setup. Advanced users may prefer manual partitioning for more control.
User Account Setup
Follow the on-screen prompts to create or log in with your user account. This will be your primary account on the reinstalled system.
Network Configuration
Connect to your Wi-Fi or Ethernet network to enable internet access.
Post-Installation Tasks
Updating Software
After installation, it’s essential to update your system to ensure you have the latest security patches and software improvements. Open the Terminal and run:
sudo apt update
sudo apt upgrade
Installing Additional Software
Install any additional software you need, such as browsers, office suites, or development tools, through the Ubuntu Software Center or the Terminal.
Restoring Data
Transferring your data back to the newly installed system is the final step. Use your backup to restore your files and configurations.
Common Issues and Troubleshooting
Boot Problems
If you encounter boot problems, review your BIOS/UEFI settings and the boot order. Ensure the USB drive is removed, and the hard drive is set as the primary boot device.
Driver Issues
If you experience driver issues after reinstalling, check the official Ubuntu documentation or forums for solutions.
Enhancing Security
Setting Up a Firewall
Configure the built-in firewall, UFW, to enhance security. Run the following commands to enable and configure it:
sudo ufw enablesudo ufw status
Regular Software Updates
To maintain a secure system, set up automatic updates or regularly run sudo apt update and sudo apt upgrade.
ALSO READ : Connecting to Your Ubuntu Server via RDP (Remote Desktop Protocol)
Conclusion
Reinstalling Ubuntu Linux can be a straightforward process with the right guidance. Whether you’re looking to revitalize your system’s performance or resolve software conflicts, following these steps will help you achieve a clean and functional Ubuntu installation.You discovered How to Reinstall Ubuntu Linux to Fix All Issues in this article. After installing Ubuntu, you could experience several problems that are readily resolved by doing a fresh installation. It makes sense to test this solution before looking into others that call for more time and technical expertise. During the reinstall, none of your personal files will be deleted. You may reinstall Ubuntu without any problems if you correctly follow the given instructions. Tell us about your experience reinstalling Ubuntu Linux and the issue that prompted you to try this fix.


